Reuben

When I first started this hobby blog, I set out to make 52 sandwiches and rank my favourites. I fully anticipated the classic reuben would make the top 10.

So let’s see how that goes.

Firstly, COVID-19 has thrown a wrench in my sandwich making plans. I live in Toronto and planned to scour the city for premium sandwich ingredients to build my perfect sandwiches. It turns out, foraging for great food is no longer in the cards.

So consider this version of the reuben the grocery store reuben. Instead of Kensington market’s delicious rye bread, I’ve retrieved a generic loaf of rye out of my freezer. Instead of sourcing smoked meat from a top shelf establishment in Scarborough, I managed to find a decent Lester’s smoked meat package of four wrapped in plastic at the grocery store. It is what it is.

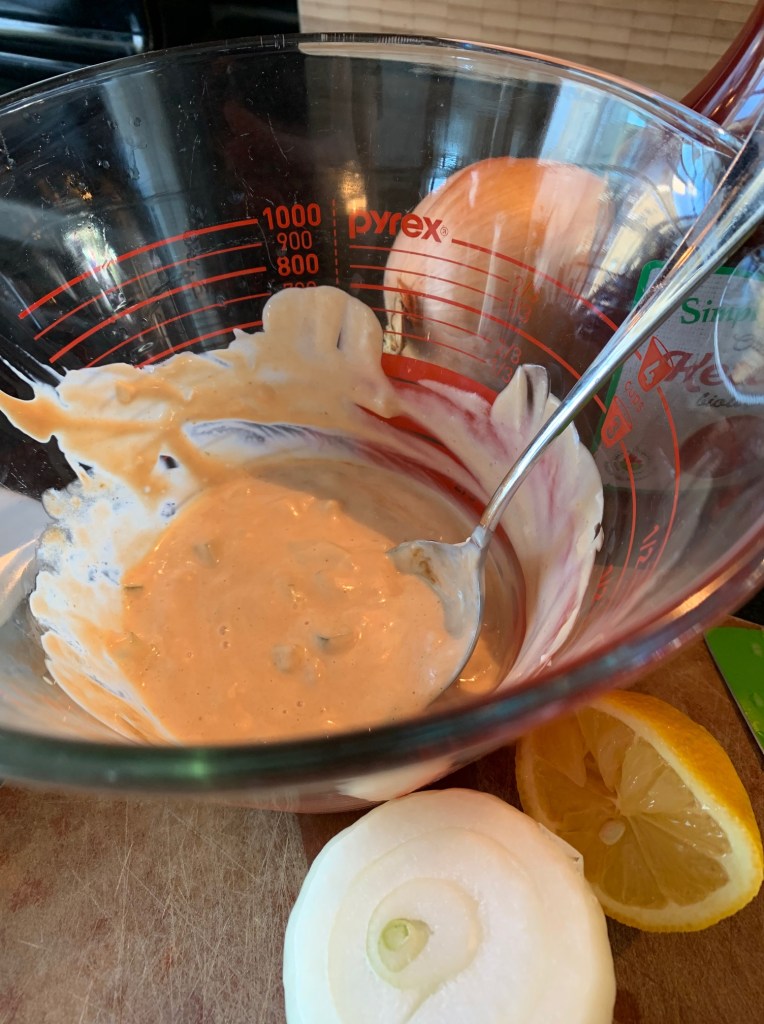
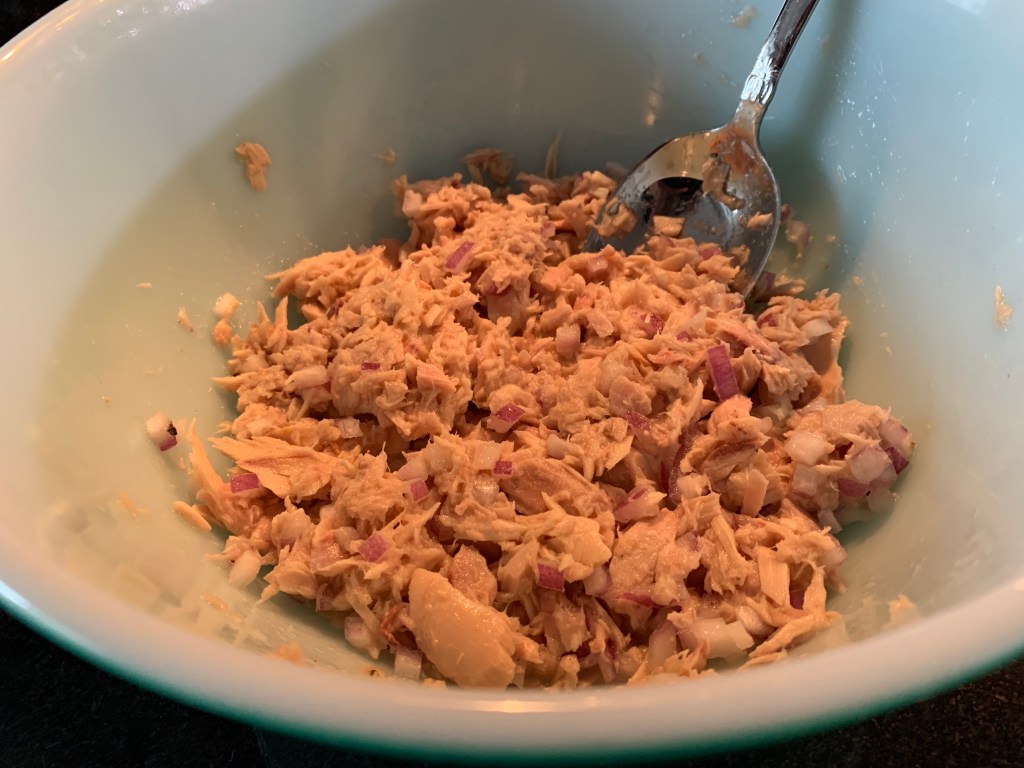
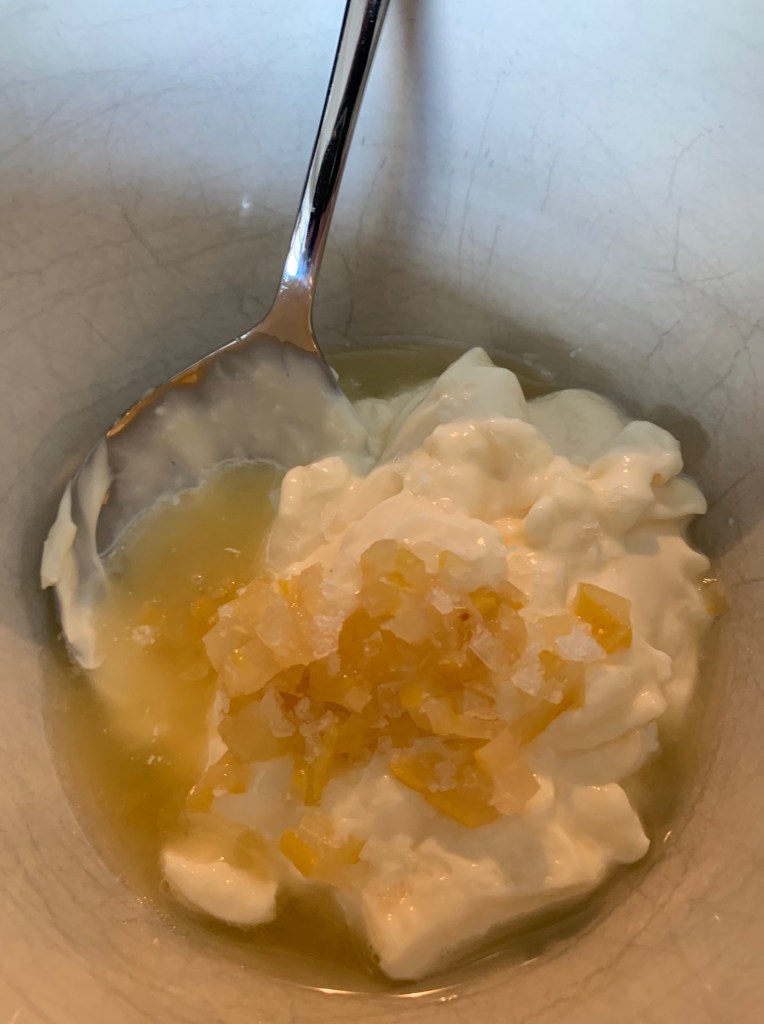
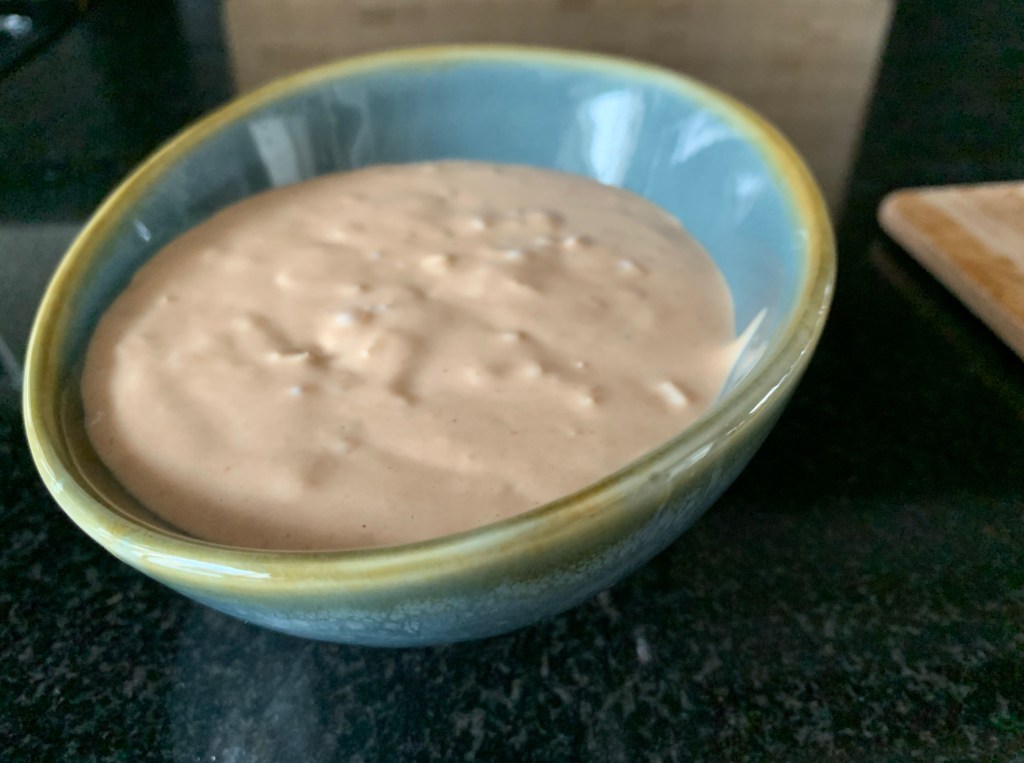
Craig often helps me with these sandwiches but in this case, he’s offered to take control of the griddle and I couldn’t be happier. My contribution is the special sauce—russian dressing.

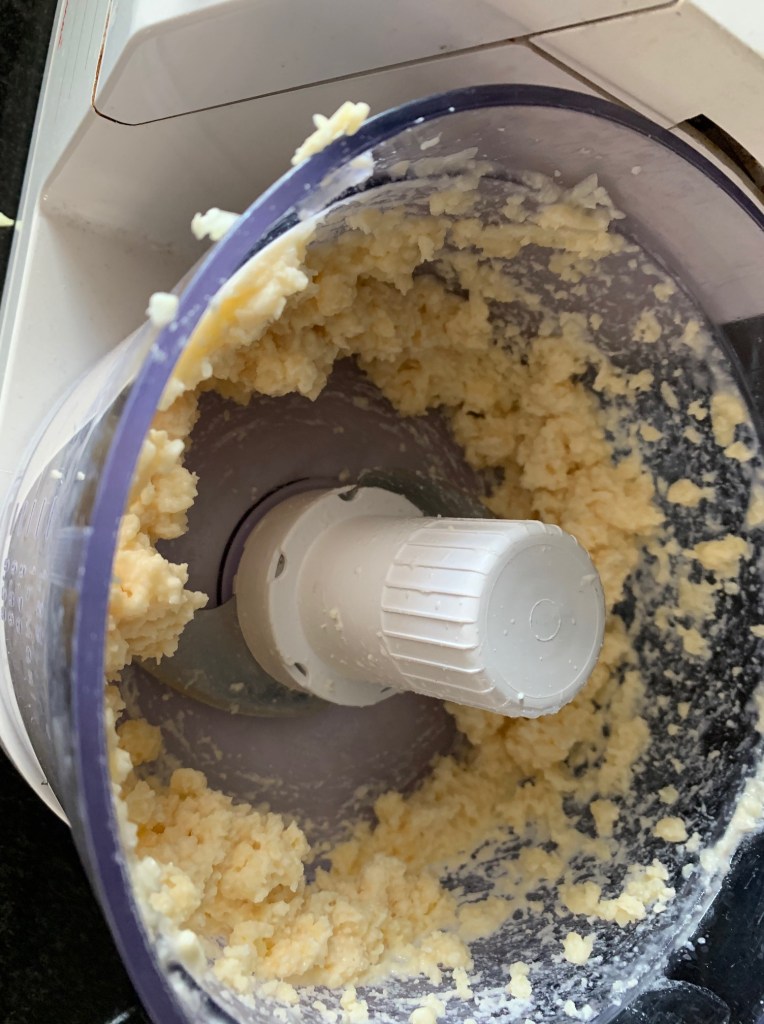
I’ve spent more time than I should have researching the myriad of russian dressing recipes out there. You could go the Martha Stewart route and mix mayo, ketchup, green relish, worcestershire sauce, and lemon. You could go the New York Times route and mix mayo, ketchup, pickle relish (not sweet), minced onion, and worcestershire.

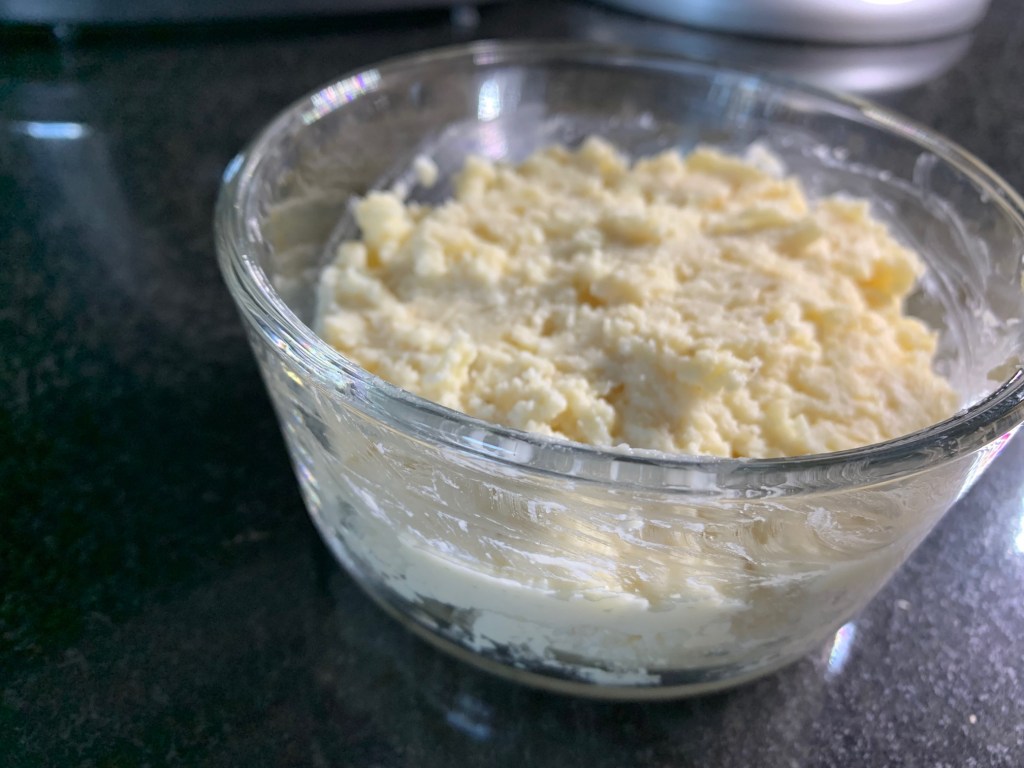
Or you could go my way: 1/2 cup Hellman’s mayo, 3 tbps ketchup, 2 tbsp minced onion, 1 tsp horseradish, 1/2 tsp worcestershire, 1/4 tsp dried mustard, a pinch of good quality smoked paprika, a squeeze of two lemon wedges. This russian dressing is so good you’ll want to put on all kinds of sandwiches or drizzle it over an iceberg wedge salad. It’s a keeper.

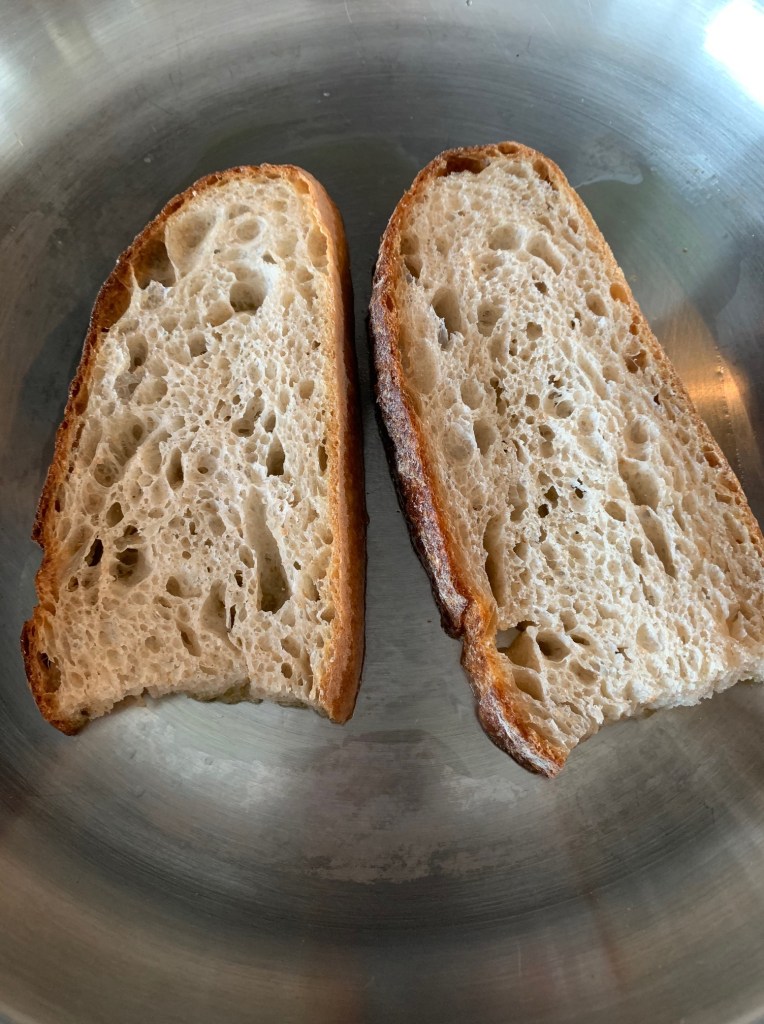
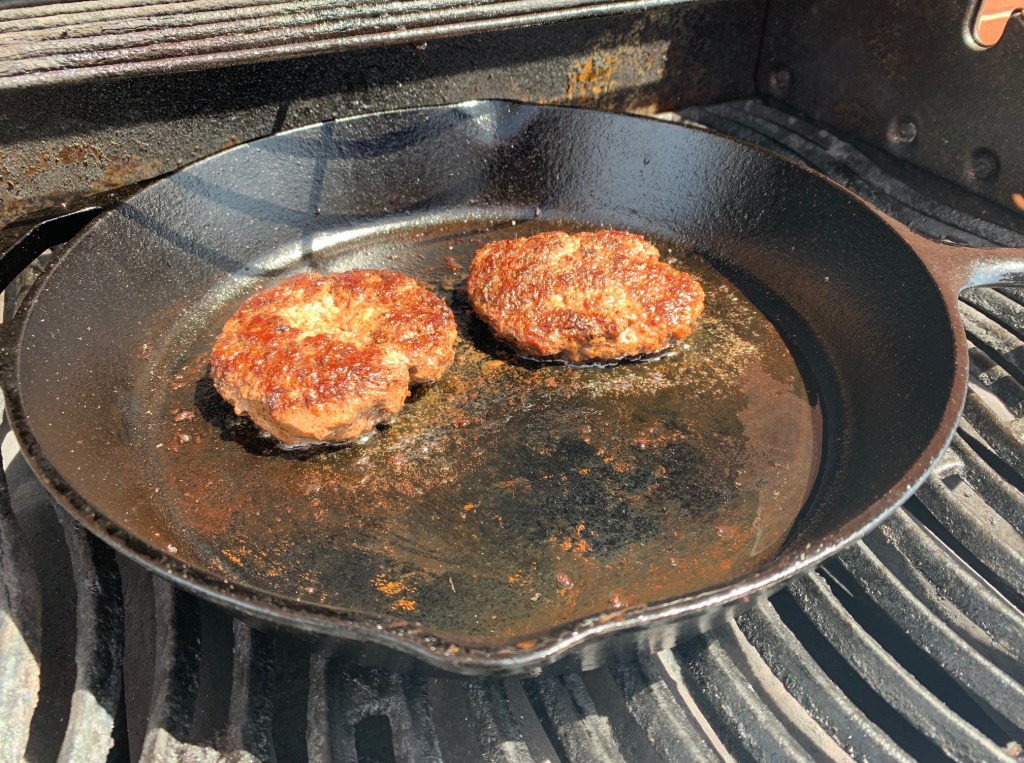
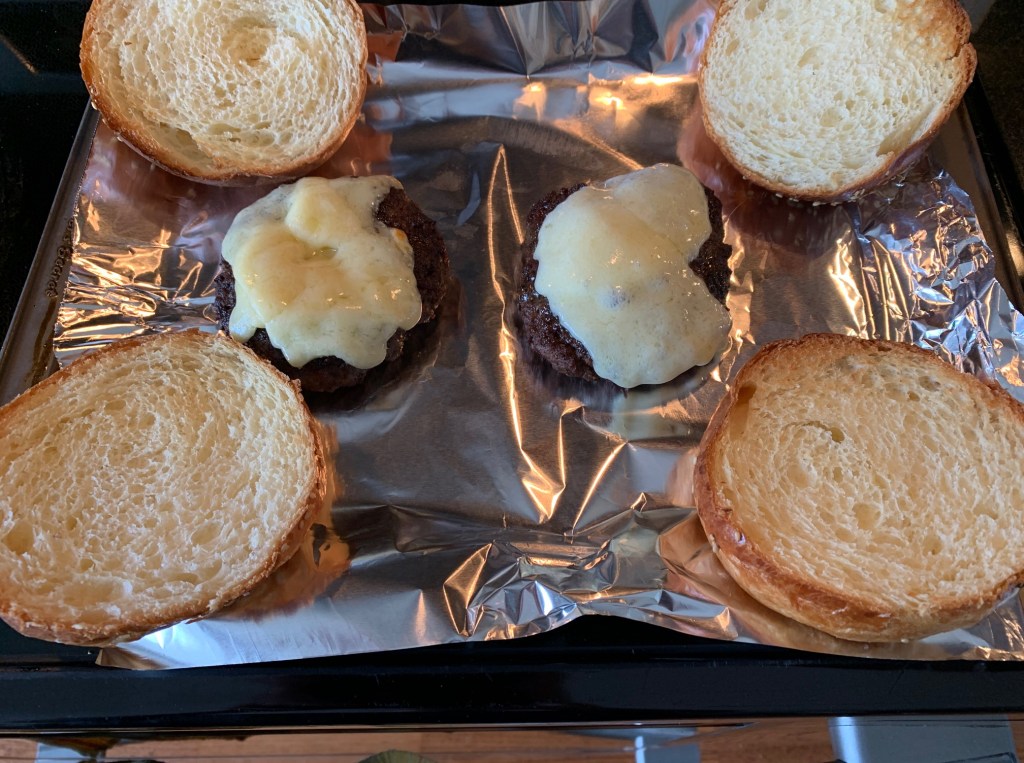
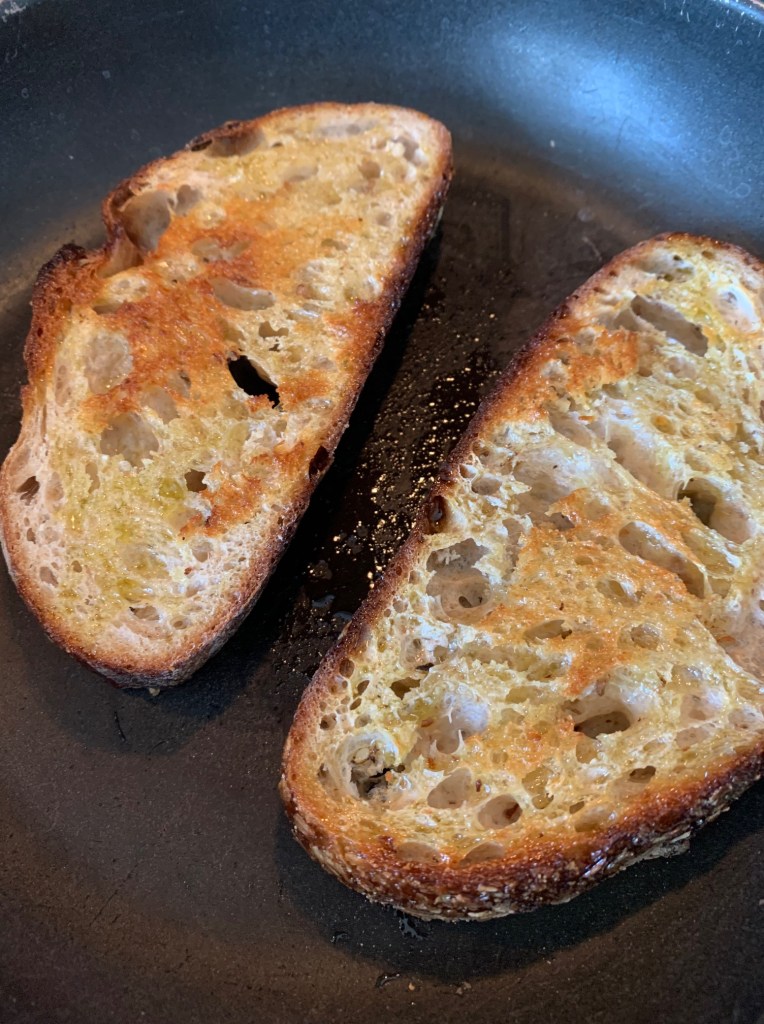
Now for the sandwich, which Craig is executing. Making a reuben is pretty straightforward: butter two slices of rye bread.

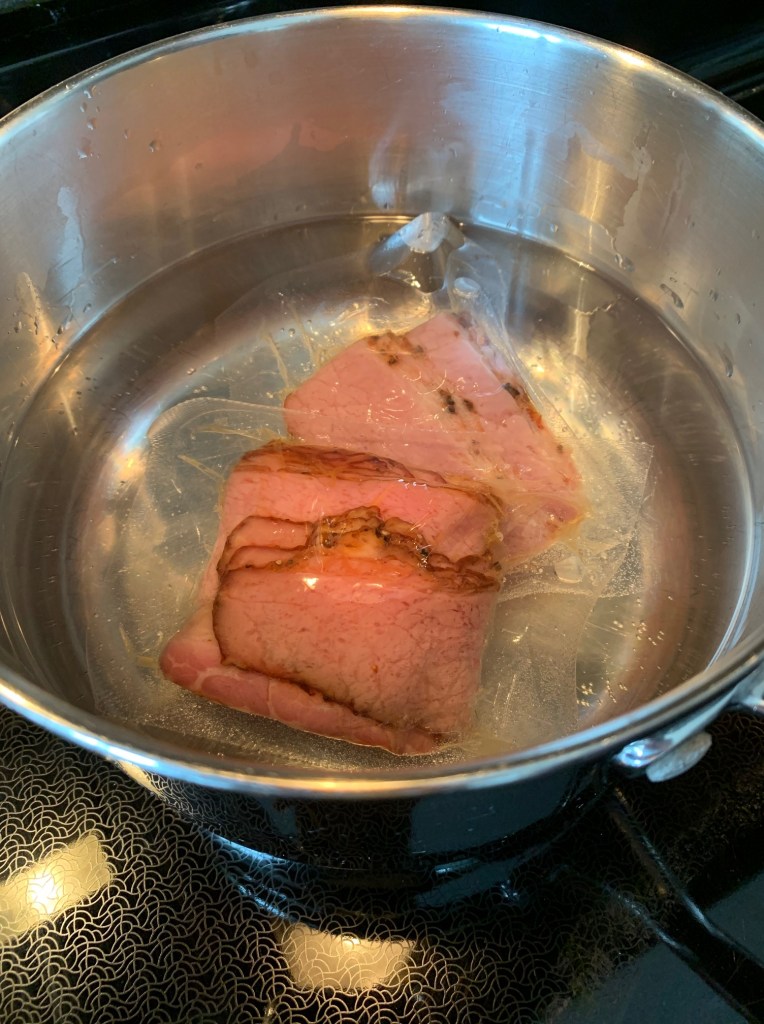
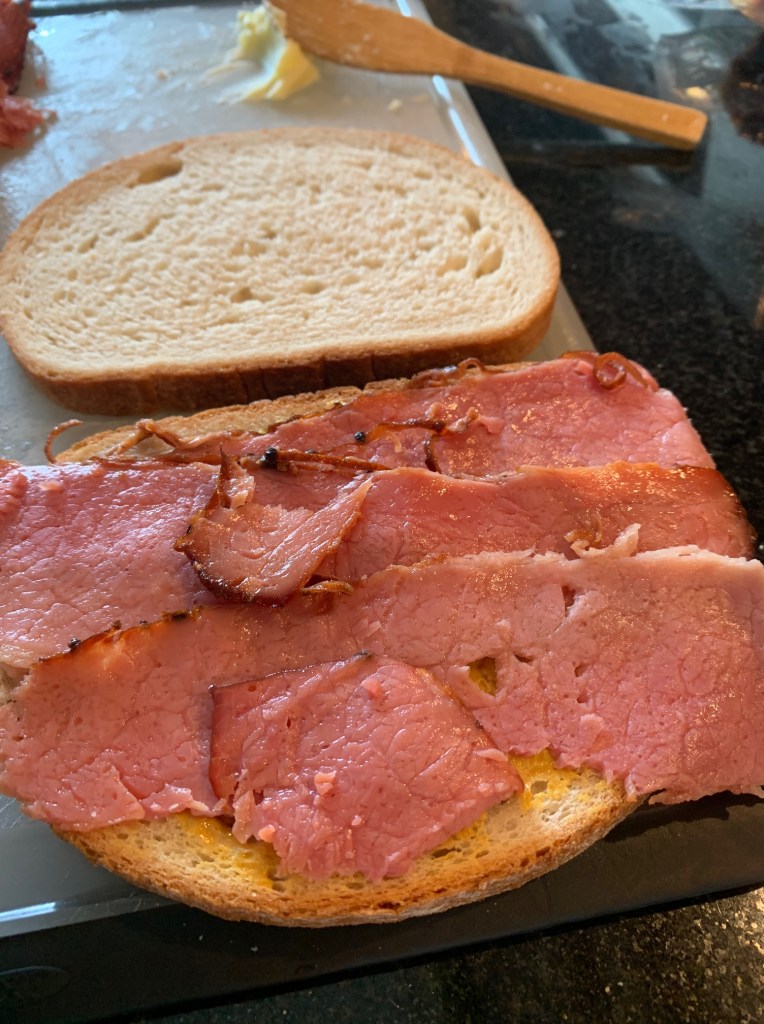
Add the meat, which in this case was heated up in its plastic case in a steaming pot of water. Not very glamorous but this is why it’s a grocery store reuben.

There are several schools of thought when it comes to meat to everything-else-ratio for the reuben. For me, less is more. For Craig, more is best. We’re going to try both versions and weigh in on which is better in the end. Let’s start with my version.

Sometimes I think I love sandwiches for the condiments and add-ons more than for the main ingredient. For instance, I am perfectly happy ordering a street meat hot dog without the wiener. I did that once at a hot dog stand in downtown Toronto and the vendor was mystified by the fact that I was ordering a bun with cheese yet still insisting to pay full price.

I told him that his condiment selection was awesome: great quality sauerkraut, ballpark mustard, chopped onions, chopped pickles. Who needs the meat?

He was so perplexed that he gave me the ‘hot dog’ for free, despite my persistence that I simply wanted a “condiment sandwich” and was happy to pay full price. So, maybe that’s just me …

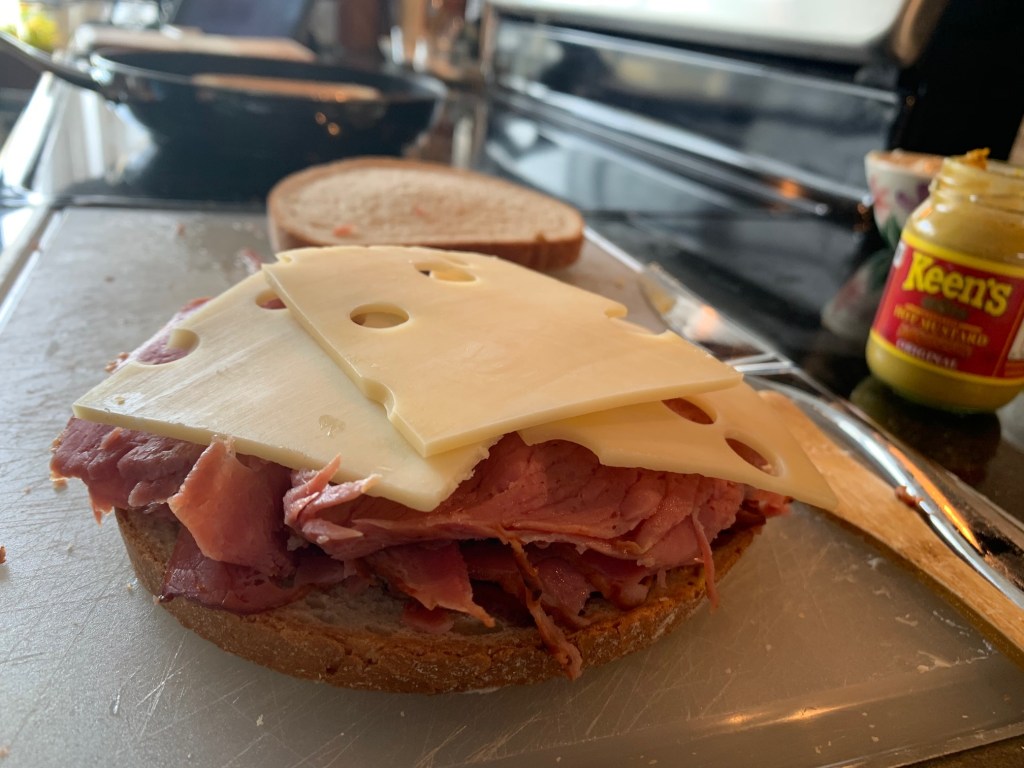
Thin slices of smoked meat goes down on my sandwich (there’s a spread of hot Keen’s mustard underneath there).

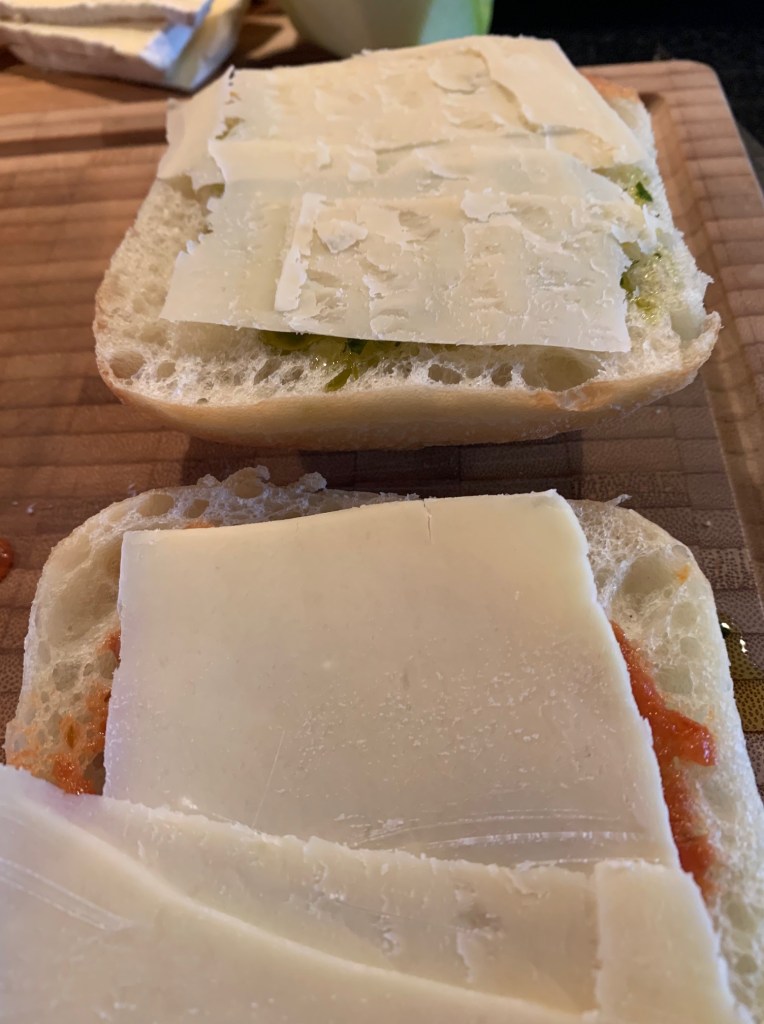
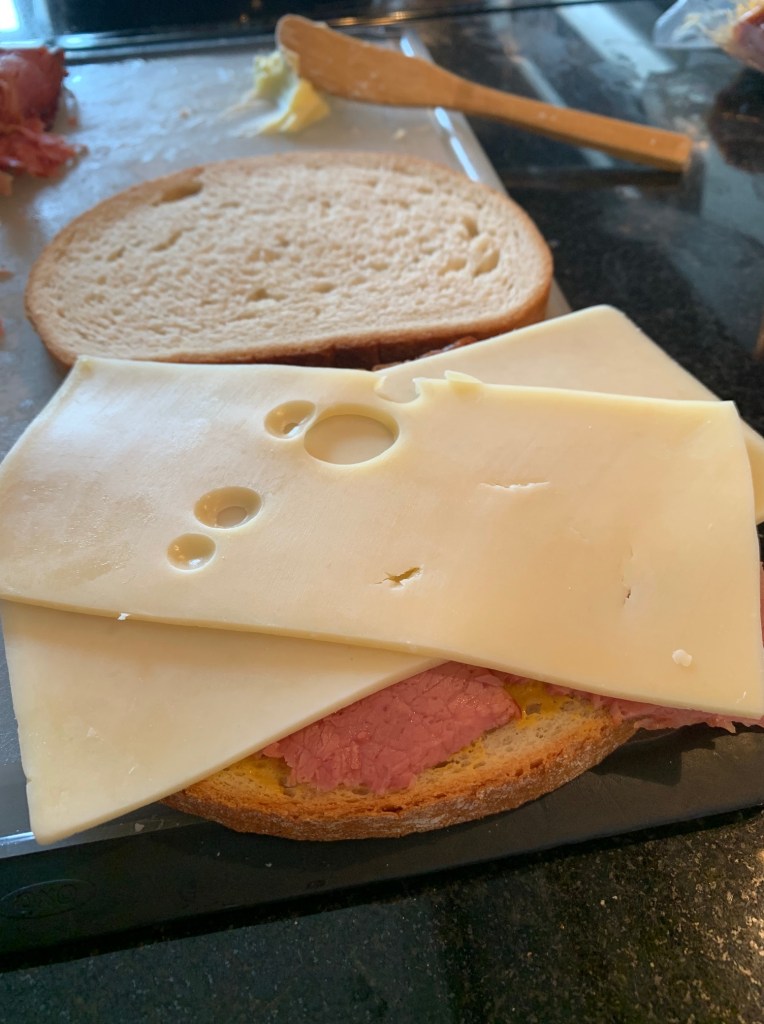
Swiss cheese goes down next.

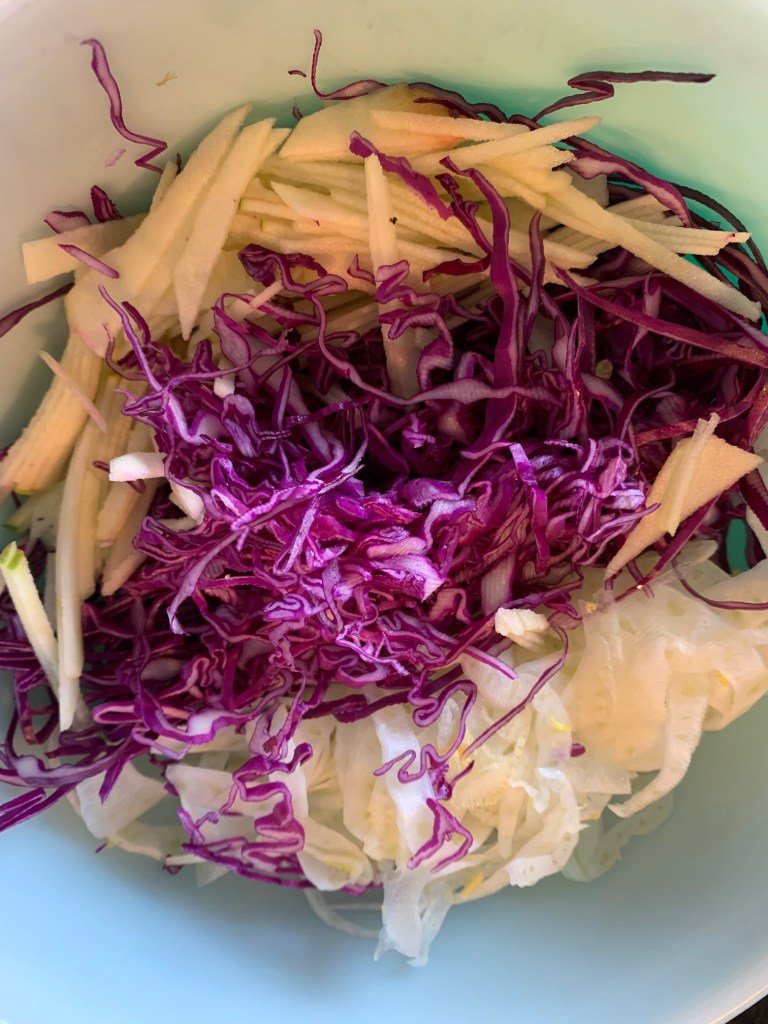
I love, love, love sauerkraut, so we’re putting a heaping pile of Strub’s wine sauekraut on my sandwich.

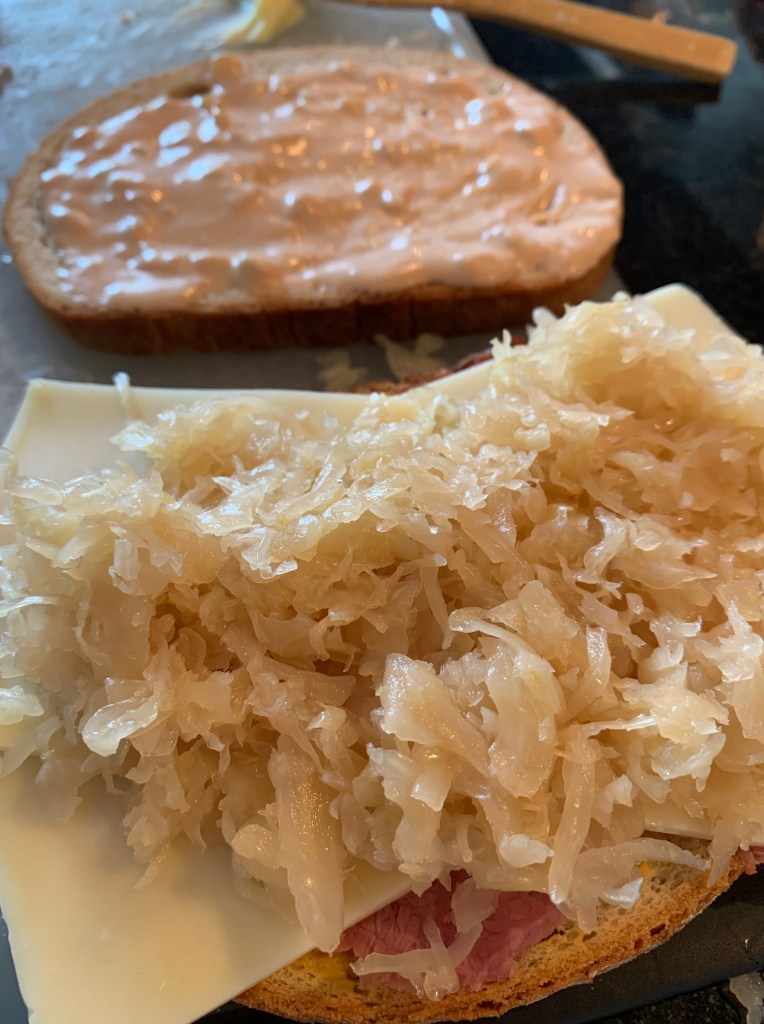
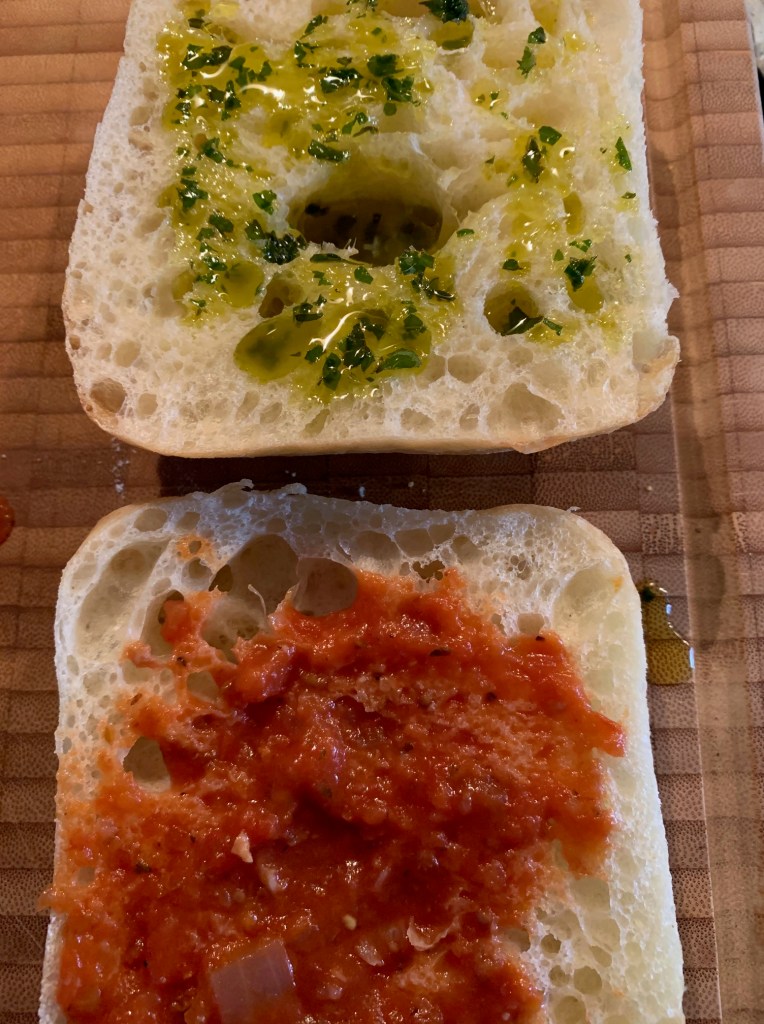
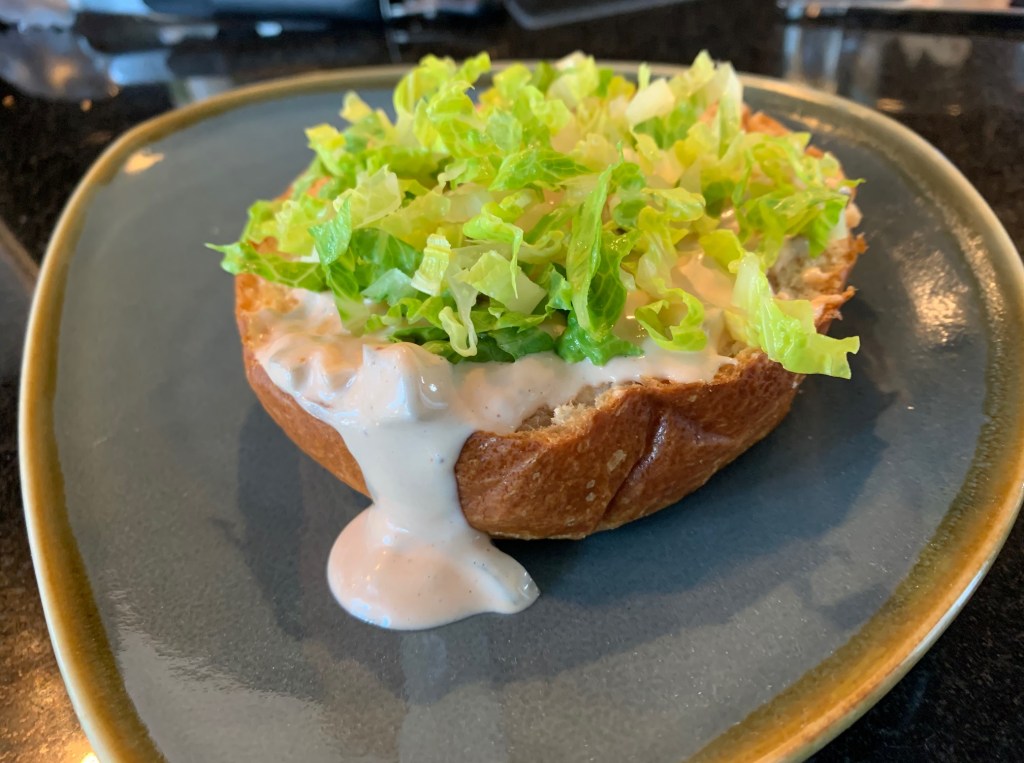
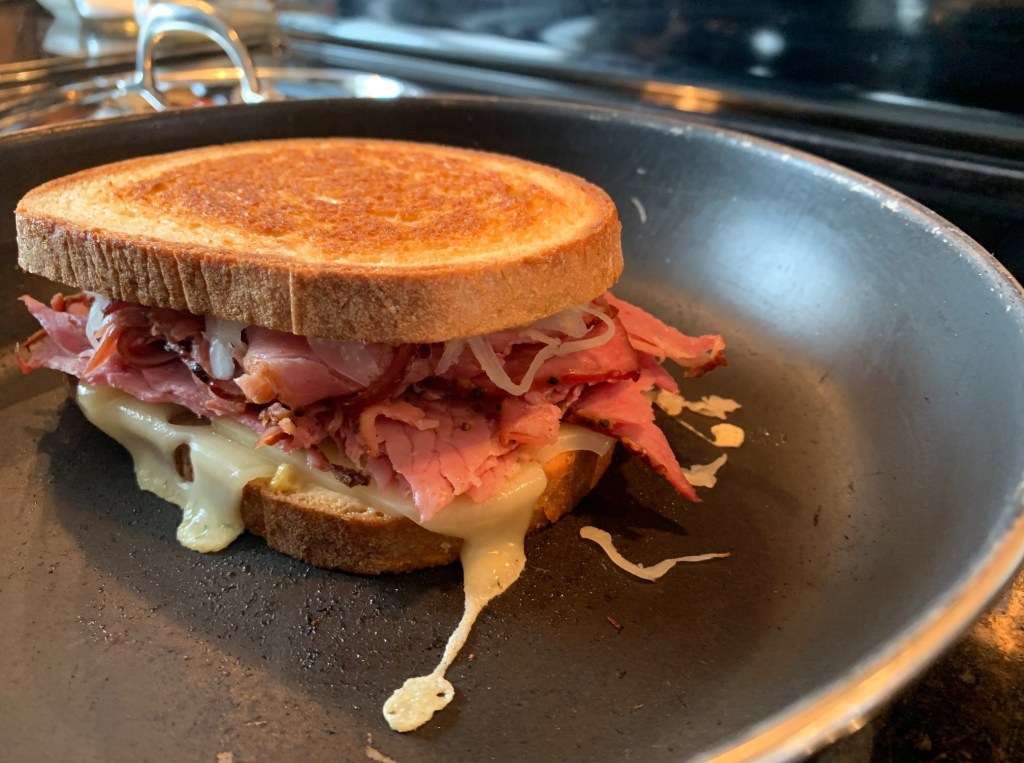
The other slice of bread gets a generous helping of my homemade russian dressing. And into a hot pan that goes to crisp up both sides of the reuben sandwich the way you would a grilled cheese. This is critical. I’ve got a bone to pick with restaurants that serve you a reuben that isn’t buttered on the outside and grilled so it’s crispy and crunchy.

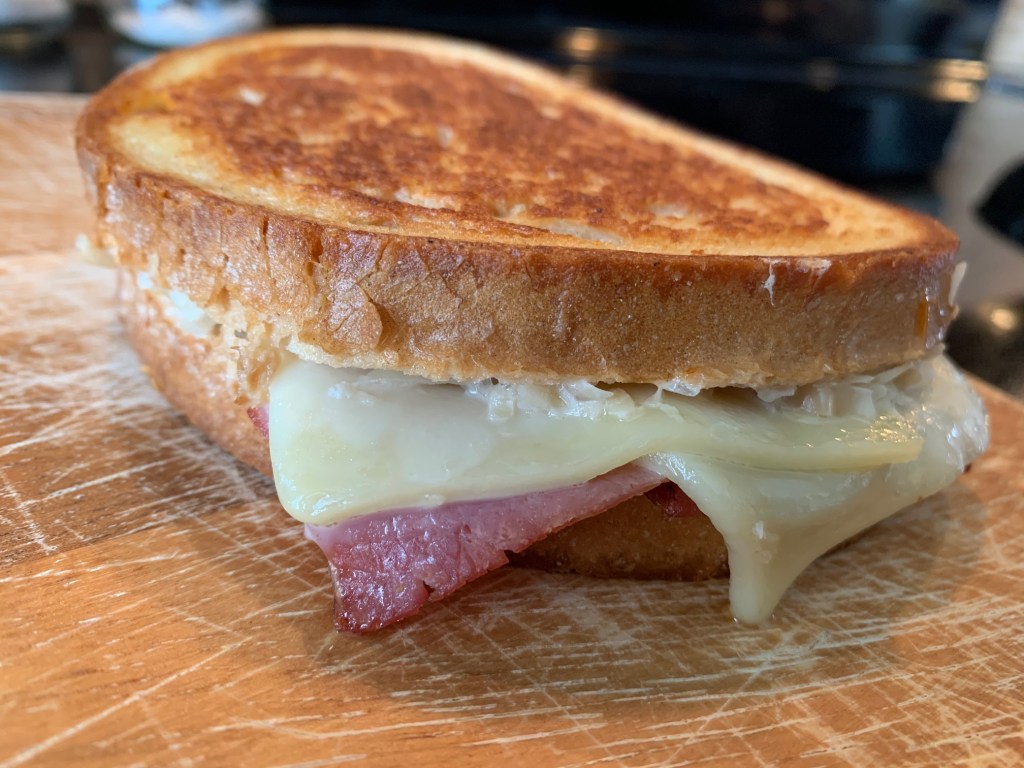
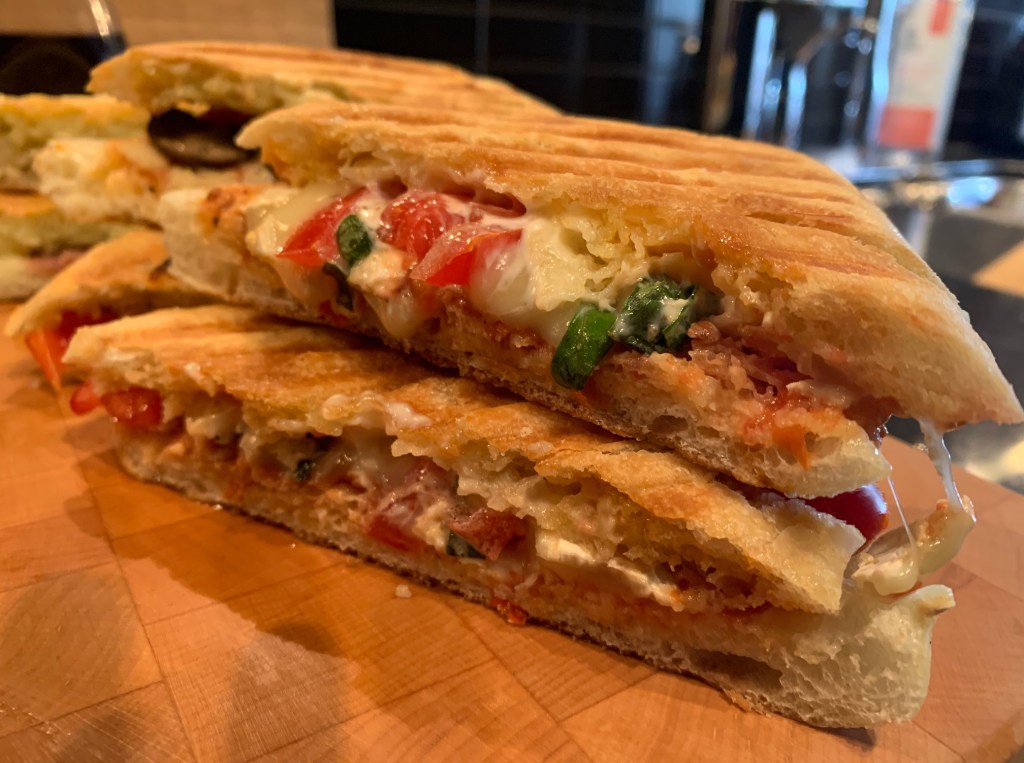
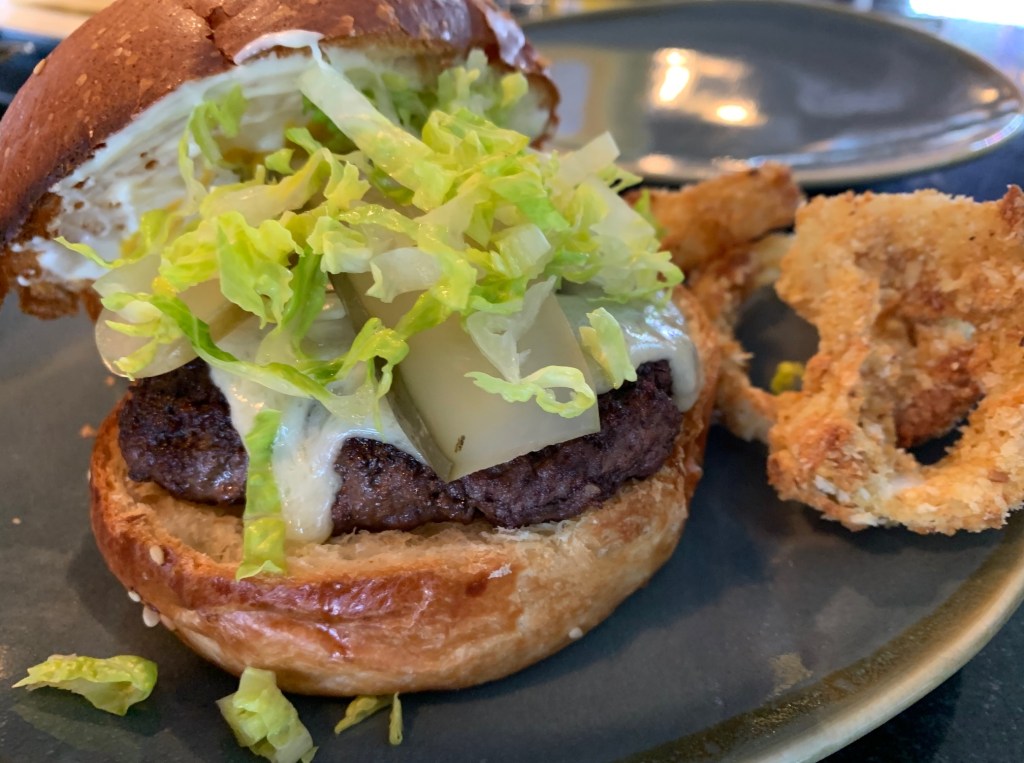
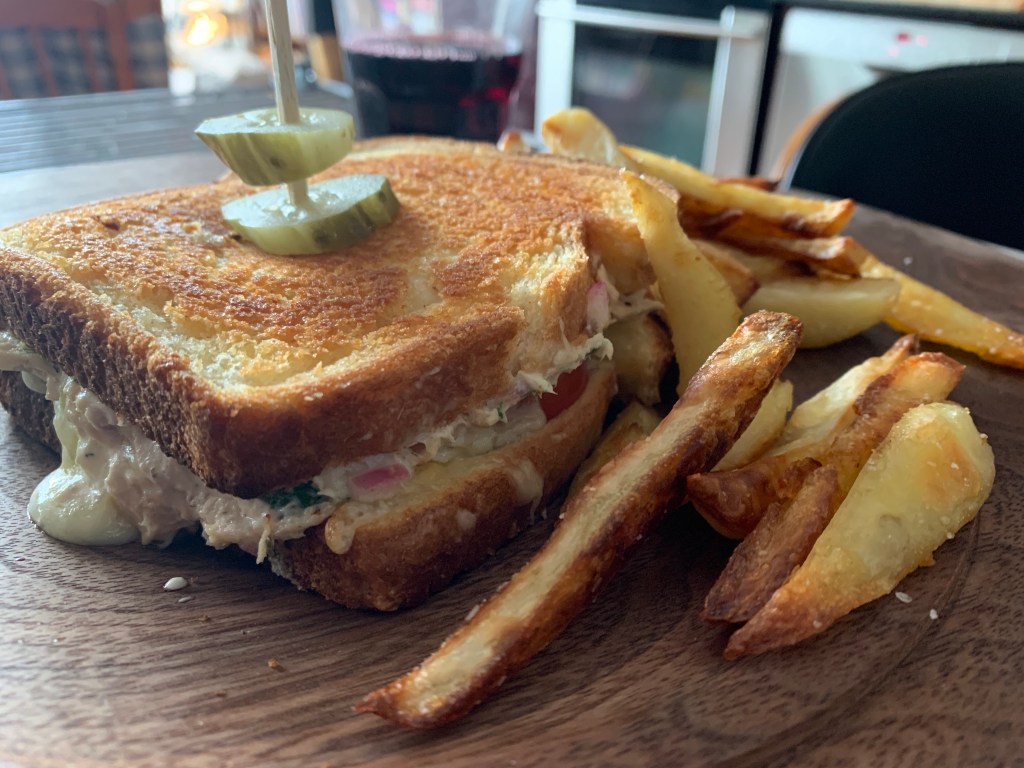
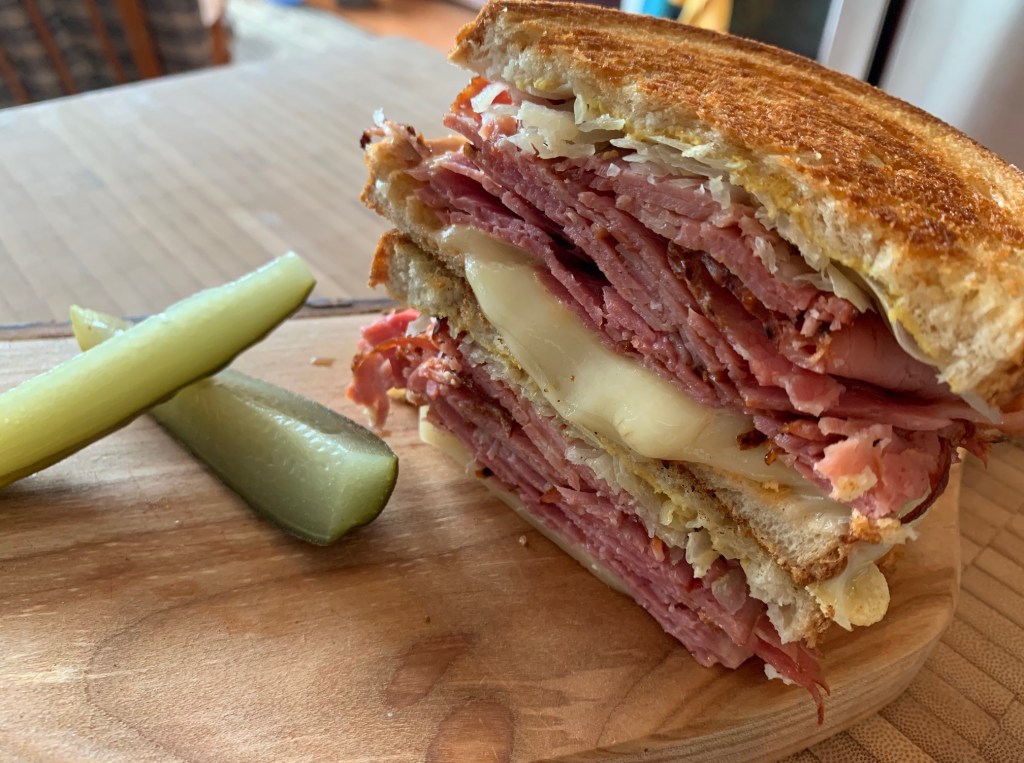
So here’s my version and it’s more condiment sandwich than proper reuben. I like it but it feels out of balance. Let’s see if Craig’s version is better.

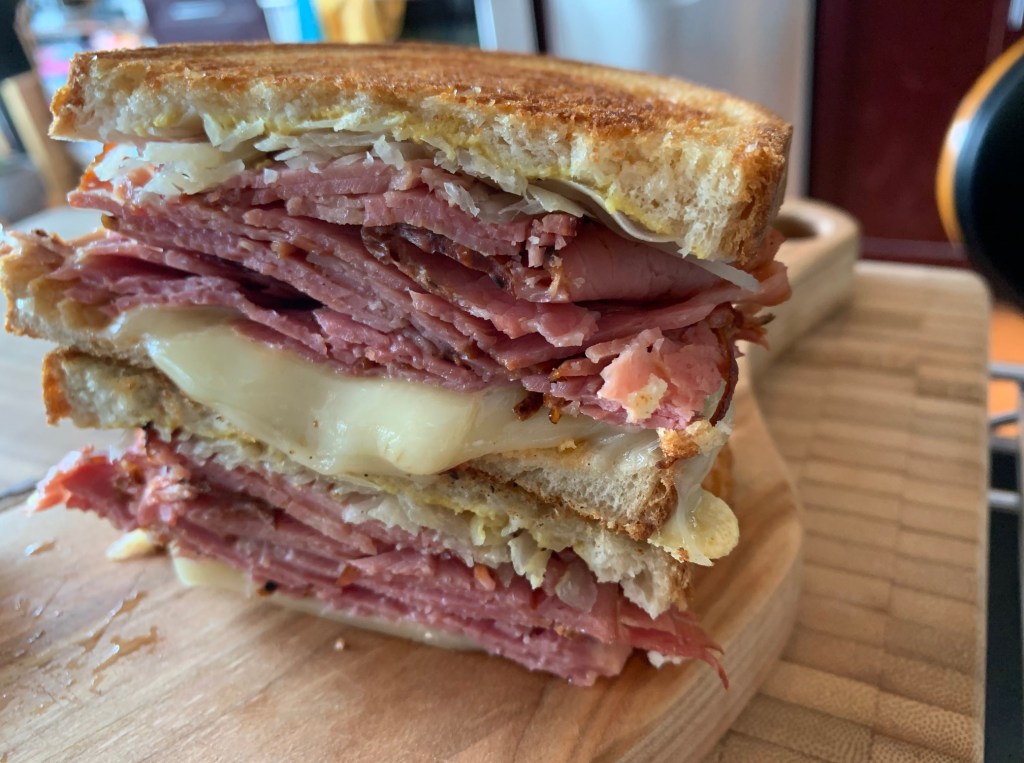
He’s changing up the ratio and the order of ingredients. Keen’s mustard goes down on the bottom slice of bread, then sauerkraut (much less than mine), then a pile of smoked meat, topped with swiss cheese. Russian dressing (less than mine) goes on the top slice of bread.

For his version, Craig changes up the method to encourage better cheese melting. The bottom half (bread, butter side down), meat and cheese goes into the pan but he covers it with a lid to steam it. Then he removes the lid and grills both sides until golden crunchy.

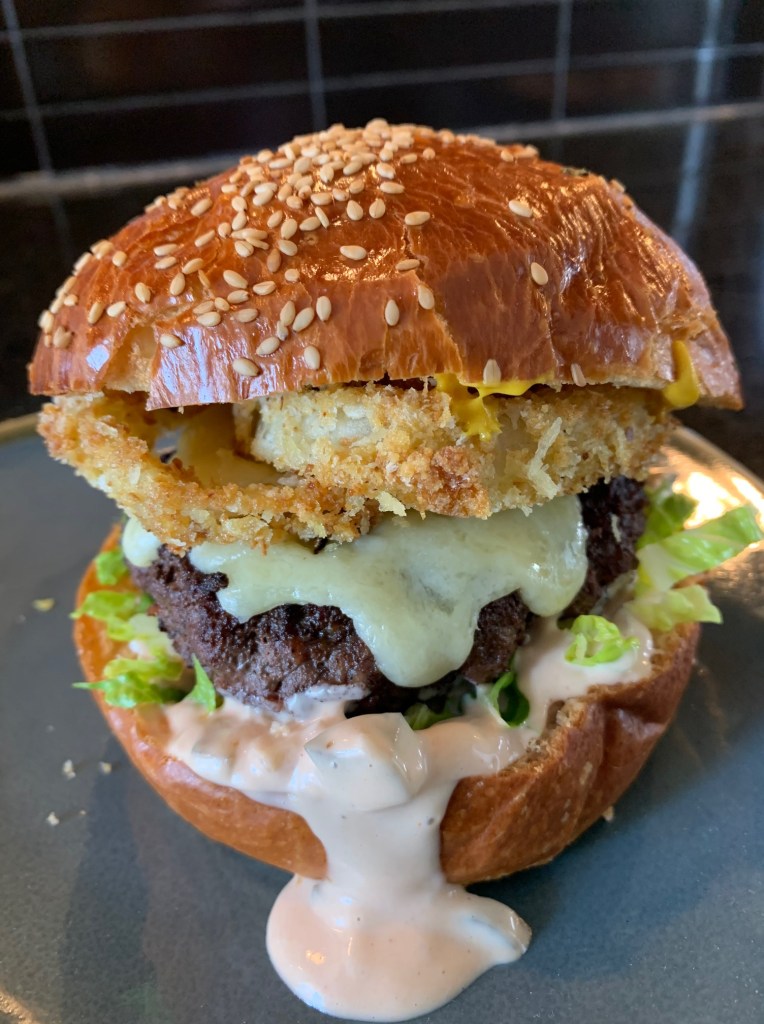
That’s more like it. We both agree Craig’s version is superior. The only thing I would change is to add more sauerkraut. But even for a grocery store reuben, this one’s better than most versions you’ll get at a restaurant. Unless you’re in Montreal or New York, of course.

–Trish Hennessy (with Craig Pickthorne)

Panini party

If you are lucky enough to have been gifted a panini press, as I was, it’s the main ingredient for any party: make it a build your own panini party.

Stack up some ciabatta buns. Set out a range of panini fixings: 2 or 3 sliced cheeses (I’m using brie and gruyere), proscuitto, thinly sliced apple or pear, roasted mushrooms (mine were marinated in a soy/lemon sauce), thinly sliced roasted red pepper, sliced tomato, ribbons of fresh basil, minced onion.

First up: I’m making a mushroom and gruyere panini. I’ve got leftover roasted mushrooms and red peppers in the fridge, so they’re going in. I thinly slice the gruyere, cut open a panini bun and drizzle some homemade basil oil (minced basil, olive oil) on one cut side of the bun and a smear of leftover marina sauce on the other bun.

Cheese goes down on both sides.

Mushrooms, red peppers, and chopped onion go next.

Into the panini press and on to the next panini. Cut open another panini bun, spread mayo on one side, basil oil on the other.

Add proscuitto, thinly sliced apple and brie, season with pepper, and into the panini press it goes.

Last panini up: Cut open another panini bun, smearing mayo on one side, basil oil on the other. Top with sliced tomatoes, shredded basil, and brie.

Into the panini press that goes. Ready now for our panini platter.

— Trish Hennessy

Fondue toast

There are so many variations of cheese toast, but this one is my favourite—in part because it serves two roles.

Served cold, the cheese spread that is the star of this toast is excellent on bread, toast, or crackers. Broiled, it makes for cheesy goodness reminiscent of one of my favourite things in the world, fondue.

Best part? This is what you do with the end bits of the various cheeses that, if you love cheese as much as I do, invariably have sitting in your fridge hoping for a new life. Apparently, the legendary chef Jacques Pépin would make this fromage fort recipe.

Dice (1/2 inch) pieces of your cheeses. In my case, I have what amounts to a cup of diced gruyere and aged white cheddar. Mince a clove of garlic. Put that into a food processor and pour enough basic white wine (tablespoons at a time) into the mixture until the cheese breaks down and the mixture binds. Looks like this—it’s a bit wet.

This will make about a 1/2 cup of the best tasting fromage fort ever. Best way to use up your cheese ends.

Let it mellow in your fridge for at least a day before using. Then, when you are ready for a simple breakfast or lunch toast (or, cut in pieces, a cocktail hour appetizer), break out your fromage fort and put it to work.

I’ve got a rustic loaf of crusty bread, so I cut two slices and I’m going to get that into a frying pan with some olive oil (alternatively, you could brush olive oil on boths sides of the bread). Bread down.

You want that bread to turn golden brown on both sides before spreading the fromage fort onto it.

Season it with pepper (I used white pepper, but any pepper will do) and place that in the pan under the broiler.

Watch it until it’s brown and bubbly, and serve.

You get the richness of the cheese, garlic, and a hint of white wine that takes you right back to the last time you had a cheese fondue. And when was that? Nothing replaces a fondue, in my mind, but here’s a great way to celebrate those flavours and produce a quick cheese melt that is distinctive and memorable.

Trish Hennessy

Epic burger

A burger is a rare treat in this household and, I’ve gotta say, I’m usually quite boring when it comes to burger preferences: patty, American cheese, pickles, onions, lots of mustard.

Today, I’m breaking out of my routine and creating an epic burger—the first one of the year: special sauce, “shreddice” (shredded lettuce), patty, a blanket of white cheddar, homemade baked onion rings (!!), yellow mustard, and a lovely Ace brioche bun. I never do this, so this is a project.

Start with the best hamburger bun you can possibly find.

Now think about your condiments. Usually I’m just happy with mustard, but today I’m trying to break from the routine, so I’m making a special sauce: 1/4 cup mayonnaise, 2 tbsp ketchup, 2 tbsp diced dill pickle, 1 tbsp minced onion, a squeeze of lemon for brightness.

Now for the extra special topping: I’m making homemade baked onion rings that are so good and so easy to make, they’re going into my regular treat rotation. Slice two white onions 1/2″ thick. Separate them, removing any filmy skin in between the layers. Pop those into a bowl of cold water.

For the batter, get the mise en place ready: One bowl of all-purpose flour (1 cup) mixed with a pinch of salt and a pinch of baking powder; one bowl of 3 eggs, whisked; one bowl of regular breadcrumbs (1 cup) combined with panko breadcrumbs (1/4 cup). The regular breadcrumbs will adhere to the entire onion while the panko will give it crunch.

Time for assembly: Take an onion slice, dip it in the flour mixture, then the egg mixture, then the breadcrumb mixture, making sure the breadcrumbs really stick. Place it on a baking sheet lined with parchment paper, and repeat until all of your onion rings have been dredged.

Those onions need a thin but generous drizzle of olive oil and then into a 400 F convection oven it goes. If you don’t have convection feature in your oven, raise the heat to 450 F. Cook on one side for 15 minutes, flip each onion ring, add another drizzle of olive oil, and cook for another 10 minutes or until those onion rings are looking crisp and golden. Voila!

Those can stay in a warm oven while the burgers cook.

Now, about the humble hamburger: I know most of us grew up with the hockey puck treatment of hamburgers—beef, breadcrumbs, egg, a ton of spices. Form into a kind of ball and grill. I much prefer a straightforward approach. Start with a good quality of ground chuck (lean). For 4 thin patties, divide 1 lb. of ground beef into 4 balls; for 4 heftier patties, divide it into 2 balls. Form into a flat patty and, using your thumb, create a dimple in the middle of the patty. Season with salt and pepper. Into a hot cast iron pan it goes (we do it on the BBQ, in the pan, on high heat) and cook until you’ve got a good brown crust on each side. Like this:

Time for cheese! I’m topping my burger with a few thin slices of sharp white cheddar and I’m topping Craig’s burger with a thin slice of Havarti—under the broiler to give it a good melt. Buns, cut side up, go under the broiler at the same time.

Ready to build my epic burgers. Craig’s first. He wants a plain bottom bun, topped with the havarti-blanketed burger. Diced white onion, two slices of pickles, and shreddice goes next. Top bun slathered in mayo and a swirl of yellow mustard completes the deal. He wants the onion rings on the side.

Now for my epic burger. Special burger sauce goes down on the bottom bun, then a handful of shreddice, because I think sauce and lettuce should go together.

Cheddar patty goes down next, topped with two onion rings. Yellow mustard goes on the top bun and we are good to go!

Why is this an epic burger? The creaminess of the special sauce, with the flavour hits of diced onion and pickle, is a star here—as is the crunchiness of the baked onion rings. The shreddice adds a hint of freshness and the cheddar burger is classic. It’s a huge burger—the most decadent burger I have ever made. What a great way to get out of my burger rut.

— Trish Hennessy

Tuna melt with fries

Just because we can’t go to the diner during COVID-19 lockdown doesn’t mean we can’t bring the diner to us.

Today I’m making a classic diner dish: tuna melt with fries that are baked in the oven and equally delicious.

I start with the fries: Peel three russet potatoes and hand cut medium-sized fry slices, then get those potatoes into a bowl of cold water to soak for 1 hour.

Now to get started on the tuna filling: Thoroughly drain two cans of tuna and keep it in the strainer in the sink. Add 1/4 cup minced red onion and squeeze the juice of one lemon onto everything, stirring to incorporate. You want the lemon to marinate the tuna and onion but you want to keep it draining so your tuna mixture doesn’t get soggy.

Most tuna melt fillings simply call for mayo, but I’m incorporating 1/4 cup mayo with 1 tbsp of cream cheese to give it more zip. Mix that with the lemony tuna mixture and add some chopped parsley. That goes into the fridge until you’re ready to make the tuna melt.

Butter four slices of bread, turn them over, and spread a thin layer of mayo on each side. Meanwhile, thinly slice Emmental cheese (6 slices for two sandwiches) and shred about 1/4 cup of Monterey Jack cheese (a good melter).

Let’s get those potatoes out of the water bowl and thoroughly dry them in a dish towel. You want all of the moisture out of those potatoes before generously bathing them in olive oil and sprinkling them with kosher salt.

They are ready to go into a 400 F oven for 30 minutes before turning and another 10-15 minutes or until they’re golden brown. Once they’re ready, toss them onto a plate with paper towel to soak up the oil and sprinkle with kosher salt.

They’re crunchy on the outside and creamy on the inside. Perfect. Now let’s get this tuna melt happening. In a large frying pan, place one slice of bread, buttered side down, top with a 1/2-inch layer of tuna spread, the shredded Jack cheese, three Emmenthal slices, a thinly sliced pickles.

Top with the other bread slice, buttered side up and cook on medium high heat until the bread is golden brown and crispy on both sides—until it looks like:

The cheesy tuna mixture oozes out and kind of tastes like tuna dip in between two crunchy pieces of grilled bread. Add those crispy fries and you’ll think you had a diner lunch without ever leaving home.

— Trish Hennessy

Bacon and egger

In the age of COVID-19, people are playing this game: what is the first thing you want to eat when you can go to a restaurant again. My answer? Brunch.

But why wait? I’ve got everything I need to make my own at home. So that’s what I’m making today. It’s the weekend and we’re lucky enough to have some grapefruits in the fridge, so I’m going to whip us up some salty dogs to get things going.

I juice six grapefruits (strained), salt rim two cocktail glasses, throw in a large square of ice, and add 1 ounce of vodka. Top that up with fresh grapefruit juice. Delicious.

Now to get down to business. I’ve got my english muffins, cheese slices, and butter waiting for action. You want to get that ready ahead of time so you can quickly plate everything at the end.

It’s time to prepare the bacon and, therefore, time to enlist Craig’s help (since I rarely deal with the meat side of things). Craig is going to do two bacon treatments: one is a simple bacon weave that can get good and crispy (how I like it) and another where he folds the bacon to create nests (less crispy — how he likes it).

See how he just weaves the bacon into a lattice square? That goes down on a pan lined with tin foil. Now for the nests. Step one, fold two slices of bacon into this shape.

Then insert one of those cones upside down into the other nest. Like this.

The bacon tray goes into a 350 F for about 20 minutes. Meanwhile, let’s get started on the omelette. Craig usually makes the omelettes at our place, so he teaches me how to do it. Four eggs go into a bowl, along with 2 tbsp milk, a crack of black pepper, and two tsp of finely minced fresh chives (use whatever herb you have on hand). Gently whisk until the ingredients are incorporated.

I’m making two sandwiches, so I divide that mixture in two and pour the first half into a non-stick fry pan that’s already sizzling with a neutral grapeseed oil.

Craig tells me to swirl those eggs around, gently shaking the pan so that the egg is evenly spread throughout the pan. Let the bottom crisp up then fold that omelette in half with your spatula.

Now fold in those corners to create a square omelette.

Egg squared! Get that bacon out of the oven and let it rest on paper towel.

Toast and butter the english muffins. It’s sandwich building time! Bacon goes down on the button english muffin.

Egg goes on top of the bacon, followed by the cheese.

Top that with the other half of the english muffin and you have got yourself a mighty fine bacon and egger without ever having to leave your nest. Cheers to that!

— Trish Hennessy (with help from Craig Pickthorne)

Crab cake sliders

Groceries are getting harder to come by in the age of COVID-19, so imagine my surprise when I came across a 1/2 pound container of crab at the grocery store.

Time for crab cakes! I haven’t made them in years, but I’ve got all the ingredients to make crab cake sliders and I’m going for it. Lots of steps involved.

Step 1: Make my slider sauce. I decide on a variation of a remoulade. I mix together 1/4 cup mayonnaise, juice of half a lemon, 1 tbsp lemon rind from the jar of preserved lemon that sits patiently like a friend in my fridge, 1 tbsp chopped capers, a few dashes of worcestershire sauce, 1/2 tsp dijon, a dash of smoky paprika, salt and pepper to taste. It goes into the fridge so those flavours meld.

Step 2: Make a slaw to go on top of my sliders. Out comes the mandoline so I can thinly shred fennel (1 cup), red cabbage (1 cup), and julienne one apple. Pretty.

Step 3: Make a vinaigrette for the slaw. I’m going to echo the flavours in my lemony remoulade by making a lemon vinaigrette consisting of juice of 1 lemon, 1 tsp dijon, 1/4 cup olive oil, and 1 tbsp of minced fresh ginger. In goes the vinaigrette so those flavours can meld in the fridge. Nice, bright, sunny flavours.

Step 3: Make my crab cakes. Now there are three versions of your basic crab cake recipe: one incorporates crushed Ritz crackers into the crab mix, another incorporates dried bread crumbs instead, and another calls for fresh breadcrumbs. I’m going in a slightly different direction.

I take inspiration from Alison Roman’s excellent cookbook Dining In. She has a fresh breadcrumb recipe to beat all breadcrumb recipes. In my food processor, I blitz 4 pieces of crustless white bread until crumbly. I toss those into a well-oiled pan at medium high heat (I used about 1/4 cup olive oil) and, towards the end, add a minced clove of garlic.

Keep tossing those breadcrumbs until they’re golden and crispy. You can use these on salads or soup toppings, but I’m going to incorporate this delicious mixture into my crab cake.

In a bowl, I crack one egg and whisk it. I add a few glugs of worcestershire sauce, 1/2 tsp dijon, 1 tbsp mayonnaise, 1/2 pound of crab, and about 1/2 cup of the special breadcrumb mixture.

Gently mix it all together. Using an ice cream scoop, scoop 6 crab cakes on a baking tray lined with silicone or parchment paper.

Cover with plastic wrap and pop that in the fridge for about 1/2 hour.

Step #5: Fry the crab cakes. Into a pan goes a neutral oil at medium-high heat. Dredge your crab cakes in panko crumbs for extra crunch and pop them into the pan, cooking until they’re golden brown on both sides.

Crab cakes are ready to plate. Butter your slider buns and toast them under the broiler.

The remoulade goes down on the bottom bun. Top that with the crab cake and a mound of slaw. And that’s what I’m talking about. It’s a study in contrasts: the toasted garlicky breadcrumbs play well with the crab; the slaw gives visual and textural sharpness; the toasted brioche buns are rich and buttery; and that remoulade stands out, bite for bite.

— Trish Hennessy

Ham biscuit brunch

One of things I love most about brunch is the ability to take leftovers, like last night’s ham, and pair it with homemade baking—to everyone’s delight.

Enter the decadent but super easy to make biscuit. Make a batch of these Martha Stewart-inspired biscuits, set out ham, cheese, pickles, mustard, rhubarb compote, and butter, then let your guests build their own brunch experience.

Of course any roast from the previous night would work here, but about once a year I try to make a mini-ham and this was the night. Because I don’t bake a ham very often, I always struggle to find a glaze that I think is worthy. Here’s my beef with ham glazes: they’re too sugary. Hot take: ham does not need brown sugar. Don’t at me.

My glaze consists of 1/4 cup of tamari, 2 tbsp dijon mustard, 1 tbsp olive oil, and 1 tbsp honey. I pop the mini-ham onto a sheet pan, score it with a knife a little too vigorously (it happens), nestle it in foil, then I add the glaze and about 1/4 cup of chopped pineapple for flavour and moisture.

Loosely cover that ham in tin foil, bake in a 350 degree oven for 45 minutes. It comes out beautifully.

That’s going to get sliced thickly for tomorrow’s biscuit sandwiches, so that the ham is as much the star as the homemade biscuit.

You can see I scored that too deeply. It doesn’t impact the flavour but, visually, I’m not entirely pleased. Ah well. Time for a good night’s sleep because I’m on baking duty in the morning—and I’m not the world’s greatest baker.

The trick to great baking is to follow the recipe, word for word. This does not seem to be in my DNA, so it’s a struggle, but I’m committed to follow this Martha Stewart biscuit recipe to a T. Let’s see if I can do it. First, my mise en place.

In a large bowl I’ve got three cups of all-purpose flour, 1 tsp kosher salt, 2-1/4 tsp baking powder, 3/4 tsp baking soda, and, begrudgingly, 1 tbsp of sugar. I try my best not to incorporate sugar in my food, but I’ve committed to following this recipe to the letter, so sugar goes in.

I’ve cubed up 1 stick + 2 tbsp unsalted butter and popped that back into the fridge to chill a bit before going into the flour mixture.

Butter is chilled and ready for me to work into the flour mixture. The goal here is to break that butter into little pearls that are incorporated throughout the flour.

I start with my pastry cutter but realize it’s not breaking down the butter chunks enough, so I get my hands in there until the butter is crumbled and incorporated throughout the flour mix. I create a well in my bowl and pour in 1 cup of buttermilk.

With a fork, I work the flour into the buttermilk until I’ve got a shaggy mess, then I plop the biscuit dough onto a sheet pan that’s lined in parchment paper. The parchment paper is key here, because we’re going to put that to work. We’re going to shape the dough into a rectangle, then fold it in half using the parchment paper.

Press down on that folded dough until it’s in a rectangle, turn it 90 degrees, then, using the parchment paper, fold the dough in half again, working the dough with the paper. Fold it over a couple of more times until the dough looks like it’s incorporated.

This dough looks ready. I cut it into six pieces, separate them a bit so they don’t touch while they’re baking, then brush the tops with buttermilk to encourage browning.

Into a 450 degree oven they go. I set the timer for 15 minutes and, after that, keep watch until they’re browned and ready to go (it took me 25 minutes in my oven). Now look at these babies: brown on top, buttery soft in the middle. And the place smells butter heaven.

Time for brunch!

I set out Nathans pickles, last night’s ham, butter, dijon, rhubarb compote, and some segmented orange pieces on the side. Everyone gets to build their sandwich and, as long as you like ham, it’s a beautiful thing.

— Trish Hennessy

BBQ bean toast

Is there nothing more fuel efficient than a mess of beans on toast to keep the home fires burning? It’s cheap, easy, and a solid option if your physical distancing during COVID-19.

Today I’m making BBQ bean toast, working from a batch of homemade beans—I am talking those dried beans you’ve long neglected in the back of your pantry; no canned beans here.

This is my go-to pot of navy beans that is so versatile you can eat it plain like a soup, tart it up with canned tomatoes, veggies, and a meat protein for a stew, smash the beans onto a sliced baguette for crostini, or puree the beans to make a bean dip. All for the cost of, like $2.

I’m a fan of the overnight soak. Into a big pot goes: 2 cups of dried navy beans, one small quartered onion, one smashed clove of garlic, one bay leaf, one sage leaf (if you have it; I’ve got dried sage leaves from our summer bounty), 4 cups of water, and two glugs of olive oil. I add salt toward the end of the process but there’s endless debate so you can choose to add it at the start or later. Now add this secret ingredient that totally makes this pot of beans: one rind of parmesan (I keep leftover parmesan rinds in the freezer to flavour boost soups—do it and you’ll never go back).

Bring the pot to a boil, then reduce the heat to a constant simmer for 1-2 hours. I skim the foam off the top to encourage a clearer broth—because that bean water is liquid gold.

How do you know the beans are ready? When they’re creamy on the inside. These are good to go. It’s OK, you can admire that golden broth! Fish out the rind, onion, garlic, bay & sage leaves.

Time to make the baked beans with a homemade BBQ sauce. I take my bean and broth base and pour that into my 27-year-old old Dansk casserole pot. I love it but it only gets put into action for baked beans these days.

We’re going to add more flavour to that bean base by making a BBQ sauce. Into a fry pan goes one minced onion and 1/3 cup pancetta ( you could use bacon or skip meat altogether). They get sauteed until the onion is soft and the pancetta crisps up a bit (5-8 minutes on the stovetop).

Now I add 1/3 cup of tomato paste and cook that off for a minute or so.

Let’s finish this sauce with 1/3 cup tamari (or soy sauce), 1/3 cup ketchup (I use a sugar-free ketchup that’s sweetened with dates because I try to avoid sugar), and 1 tbsp honey. This is my take on BBQ sauce, which normally contains brown sugar, molasses, and spice. If you prefer that, forget about the ketchup and honey, add 1/3 cup brown sugar, 1/3 cup molasses, and cayenne to your liking.

Time to add the finished sauce to my bean broth base.

Ready to go into the oven at 350 F for 1-1/2 hours.

Make sure you put a lid on that! I always put my pot on a baking tray in case there’s spillage.

Baked beans are ready and look at that! Saucy and hearty.

Time to make toast! You can pop bread in your toaster and butter the toast, or brush the toast with olive oil on both sides and grill on your BBQ or broil in your oven. I like to put a glug of olive oil and a nub of butter in a non-stick fry pan and crisp both sides of a sturdy, rustic bread.

Time to plate up. Spoon a generous helping of those beans on toast. You can add grated parmesan or cheddar as a topping, or a mess of herbs if you have them. You could even top this with a fried or poached egg.

Here you go, rustic, old-fashioned baked beans on toast. It never gets old.

— Trish Hennessy

Avocado toast ++

I didn’t understand the mass appeal of avocado toast until I ordered one at a restaurant that was served on crusty bread and topped with a perfect poached egg.

I’ve been thinking about that sandwich ever since, so today I’m going to try to recreate it and add a few of my own twists.

First things first: you need your mise en place before you really get rolling because all the action happens quickly. Fill a large pot with water up to the halfway mark and add a couple of glugs of plain vinegar. You can get that water simmering while you prepare everything else.

I’m making two sandwiches today so I’ve cracked two eggs into their own bowl.

For my avocado spread, I mashed two avocados, added 1/3 cup of chopped red onion, squeezed the juice of one lime into the mix, and seasoned with salt and pepper. This can be prepared the day before and kept, covered, in the fridge. I’ve also shredded 1/2 cup of white cheddar. Now it’s time to get to work.

I brush two pieces of crusty sourdough bread with olive oil and add a glug of oil into a non-stick pan, set at high. We’re going to toast these babies on both sides so that we get a golden brown exterior.

Set those toasts on a plate and paint on some of the avocado mixture.

Add the shredded cheese and your sandwich base is ready.

Time to poach our eggs. Using a wooden spoon, stir the simmering water to create a vacuum in the middle. That’s where we’re going to gently drop our eggs, one at a time, stirring after each egg goes in to create that opening in the middle.

Once the eggs are in, stop stirring and wait. I want a soft yolk, so after bathing in the water for two minutes, eggs come out—gently, one at a time, with a large spoon; tilt that spoon to get rid of excess water.

Place those eggs on paper towel so it can absorb any remaining moisture and then we are ready for plating. Using two spoons, gently place an egg on each toast.

Sprinkle the egg with finishing salt (I used flaky Maldive, which I love) and freshly ground pepper. I had some homemade pesto in the fridge, so I thinned that out with olive oil and drizzled the egg with that finishing sauce.

And there you have it: a silky poached egg on a bed of avocado and sharp cheddar—that’s my kind of avocado toast++.

— Trish Hennessy

Design a site like this with WordPress.com
Get started