Featured

New year, new sandwich list

When I was a kid, I loved flipping through the Archie comic books—not for the plot, but for the inevitable picture of Jughead with a giant sandwich platter.

When I became old enough to help in the kitchen, my favourite activity was preparing sandwich platters for parties. Totally 1970s fare: open-faced squishy buns topped with egg salad and a slice of green olive or ham salad and a slice of pickle.

All these years later, I still adore a good sandwich. So this year I’ve decided to build 52 sandwiches—one a week—and document the fruits of my labour here.

There is a philly cheesesteak sandwich in my future, I guarantee you that. A lobster roll. A simple tomato sandwich at peak tomato season. And more.

I’ll go high brow some weeks but the sandwich is mostly a comfort and convenience food, so the grilled cheese will absolutely make an appearance or three. I’ll experiment with great picnic sandwiches. And I’ll seek the best ingredients, sampling different bread styles, cooking treatments, and condiments.

For my first entry, I wanted to start with the trusty breakfast sandwich. A Tim Horton’s just opened on the corner and I’ve been tempted to zip in and order a cheese and egg breakfast sandwich on a biscuit but that’s so boilerplate.

I’m only allowing myself one sandwich a week, so I need to make each one count. I also don’t want to start my morning with a calorie and sodium bomb, so I want my breakfast sandwich to give me energy, look and taste great, and to be reasonably healthy.

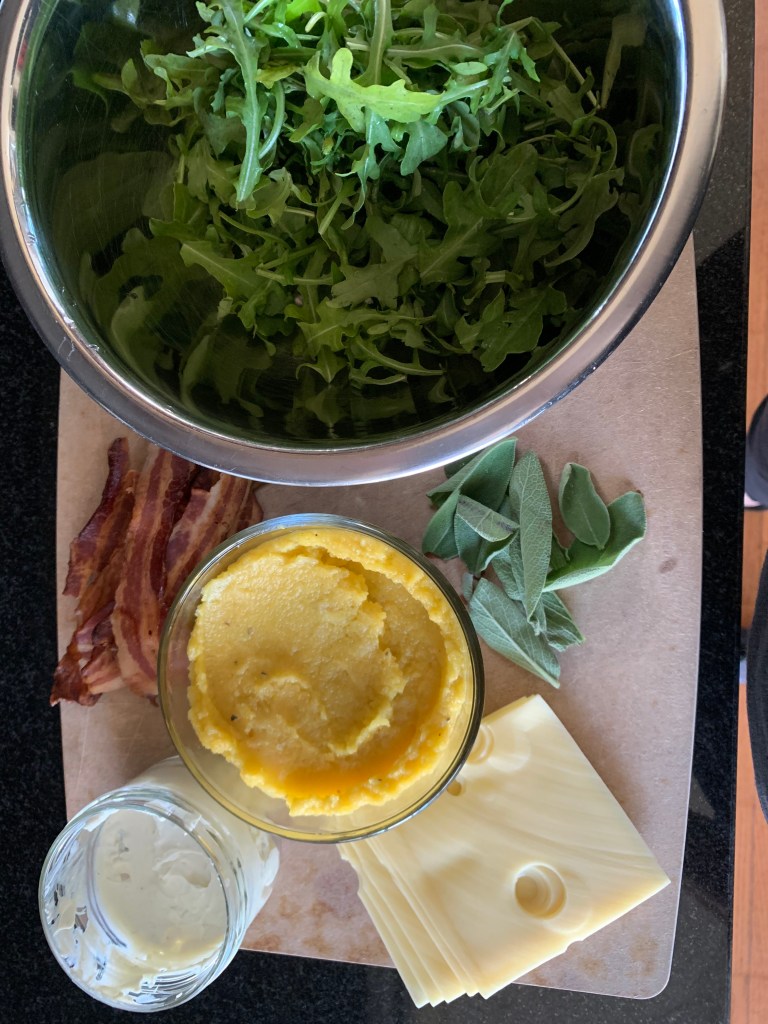
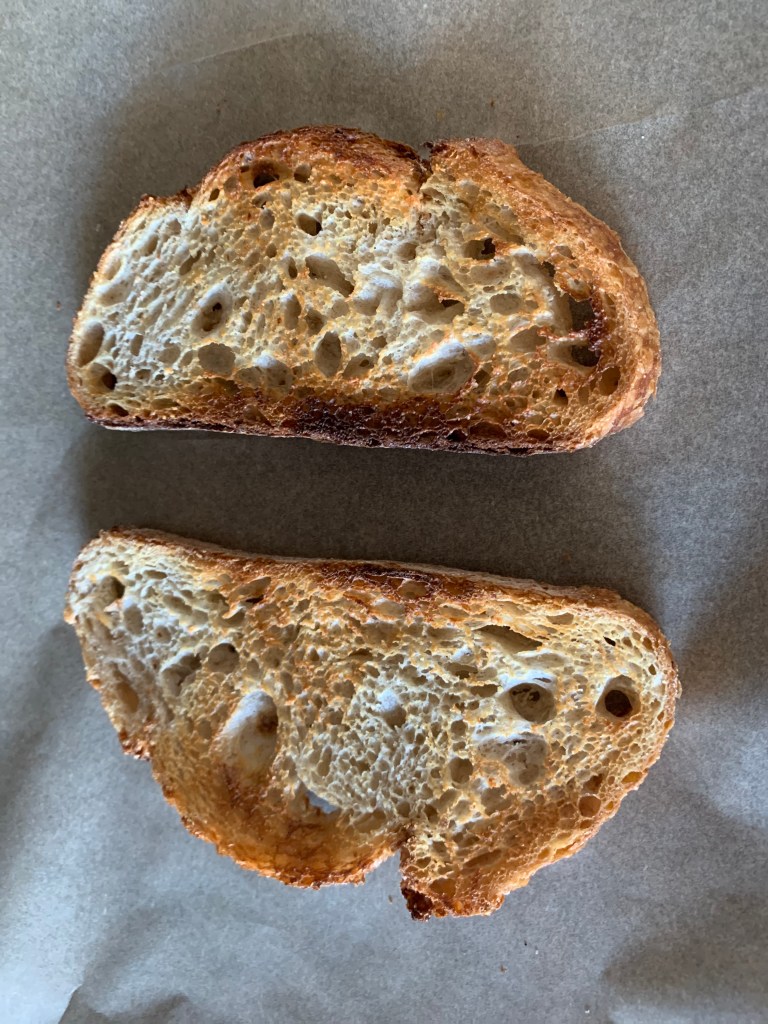
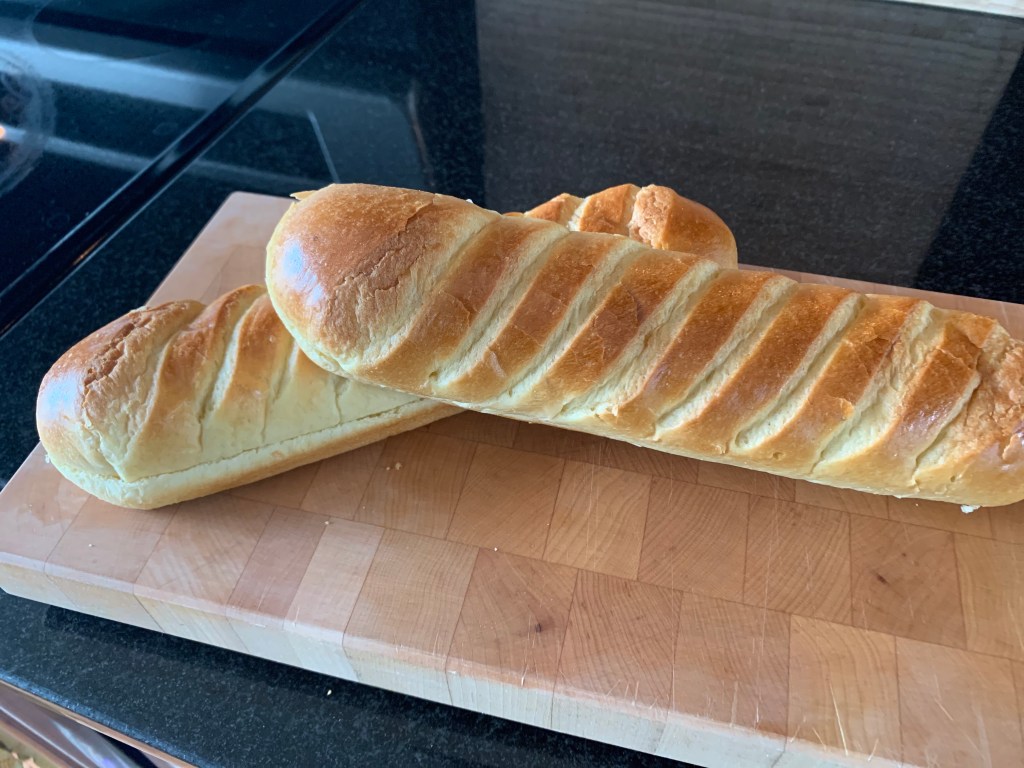
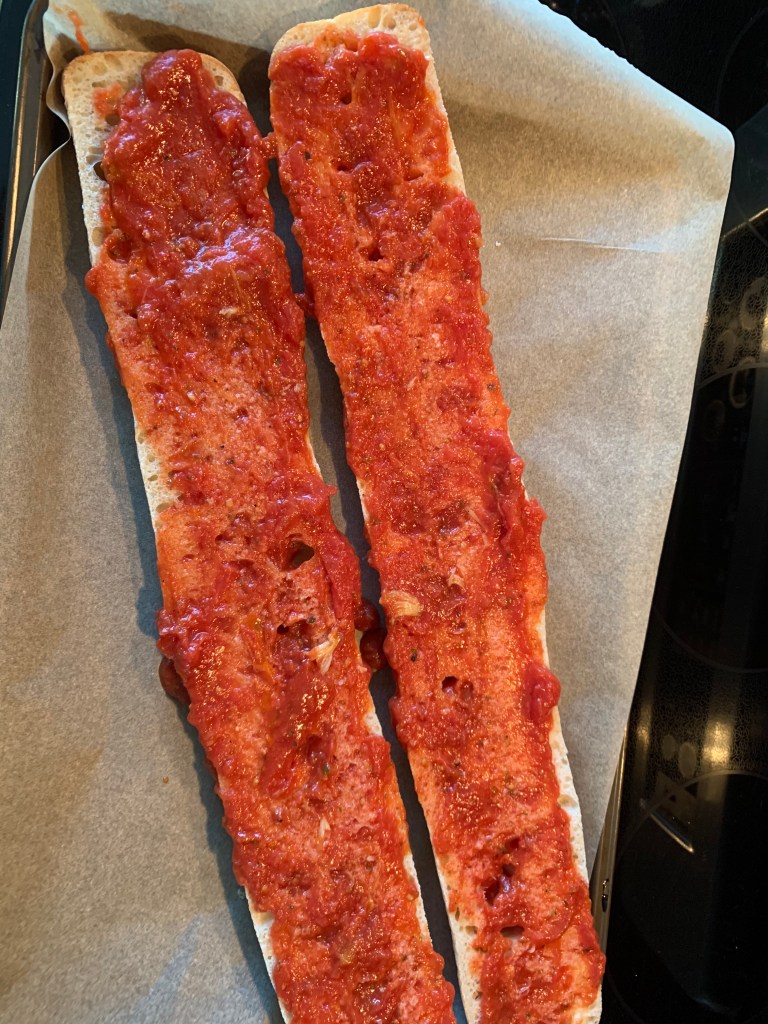
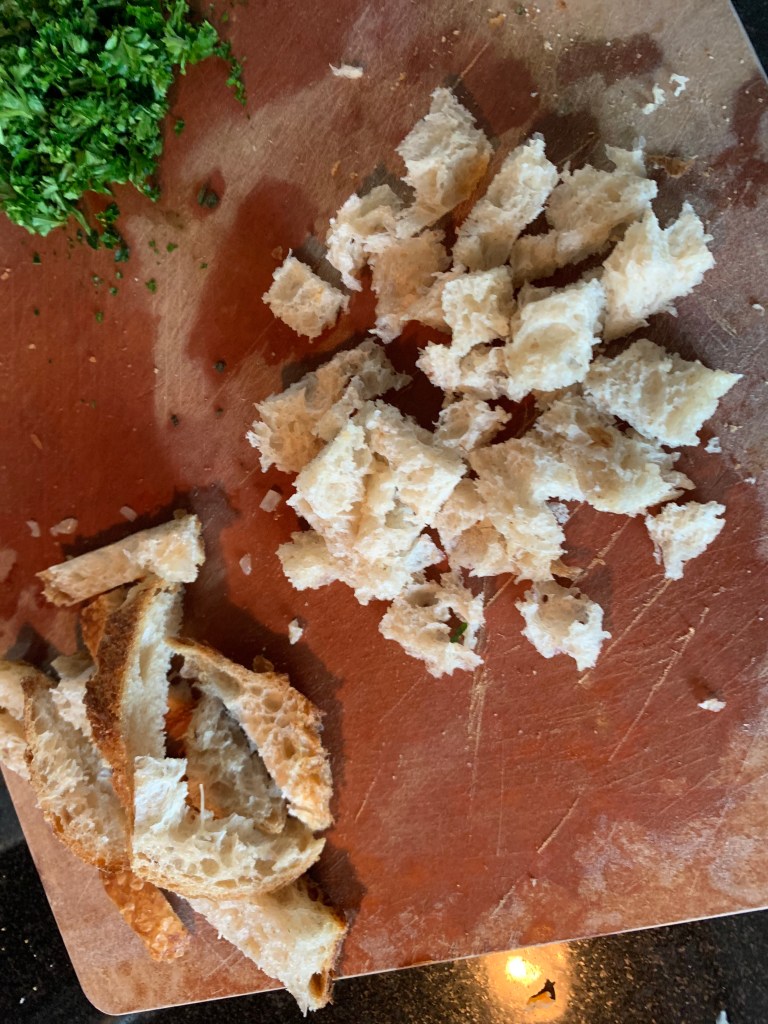
I start with a thin slice of Fred’s Bread batard, because that’s the bread I have in the house right now and it lends itself well to a tartine, an open-faced sandwich that showcases the toppings.

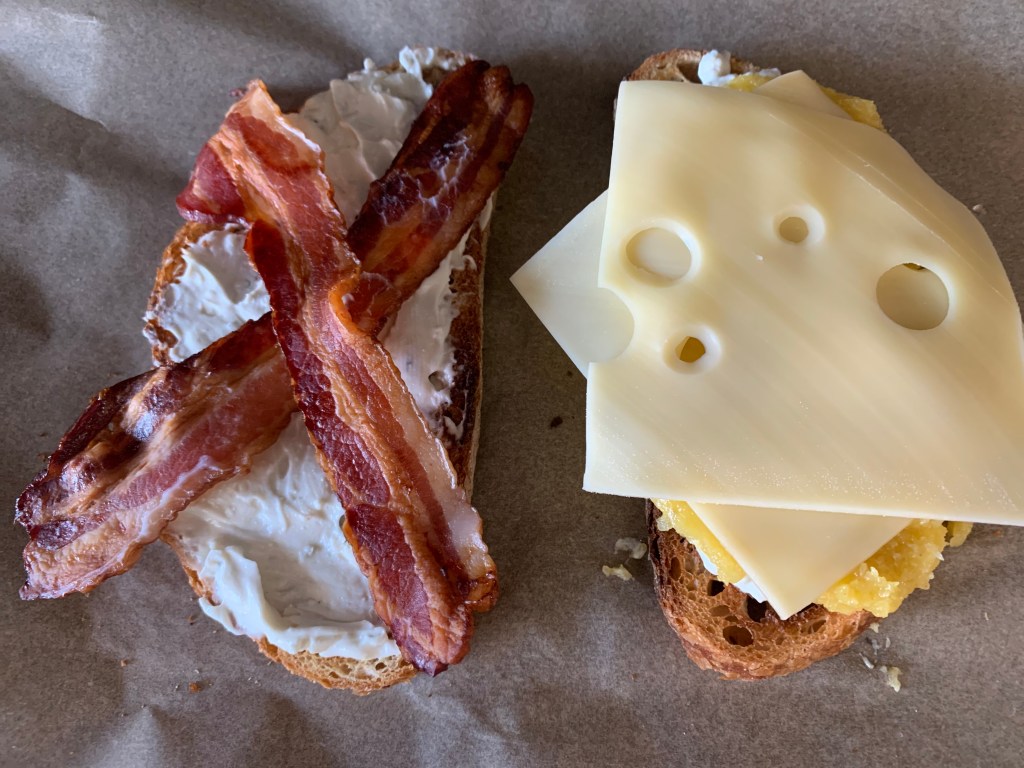
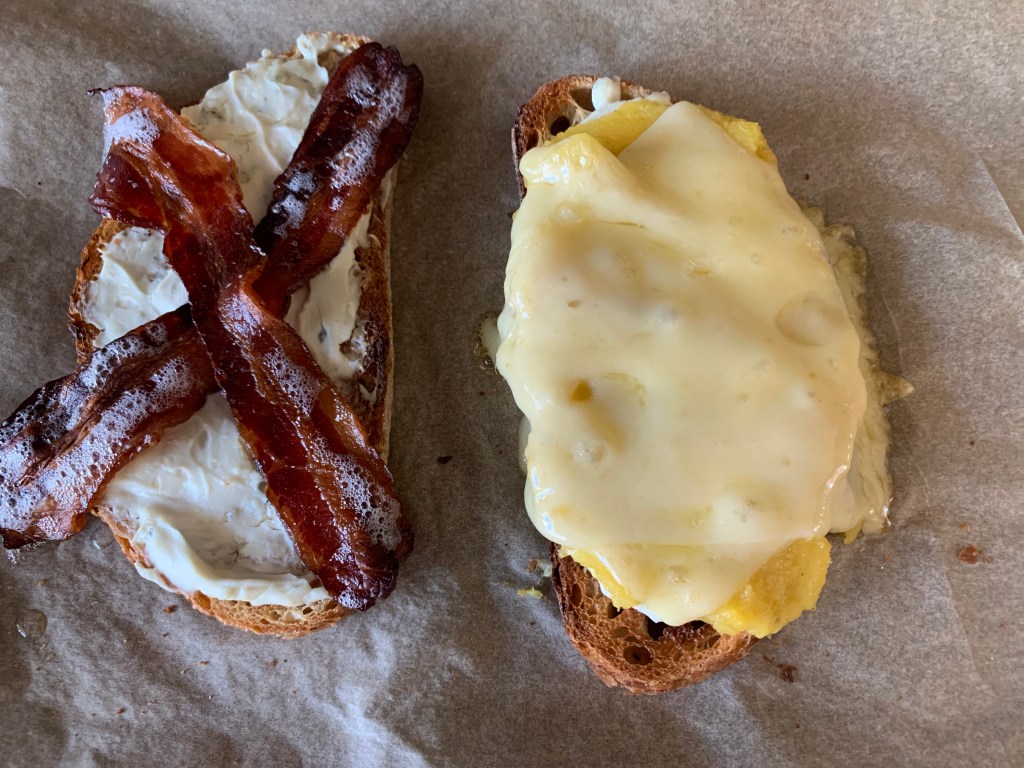
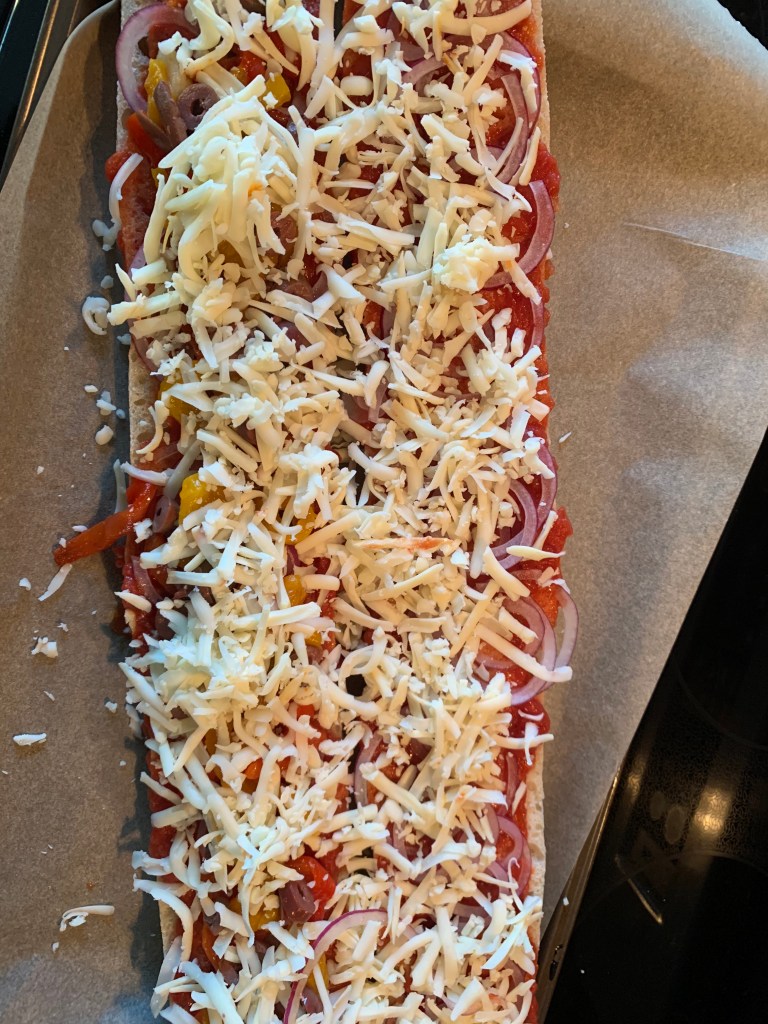
I get the oven going to 350F, place a sheet of parchment paper on a baking tray, and set my sliced bread down to start my creation. With a big spoon, I make an indentation in the middle of the bread, slice one piece of lean ham (mine came from Rowe Meats) into ribbons, and drape those ribbons around the bread indentation to create a frame for my egg. I crack an egg into the centre, season with salt and pepper, then dust everything around the yolk with a small handful of grated emmental cheese, which brings a nuttiness that is the perfect foil to the sweetness of ham. Bake for 10-12 minutes and serve. This isn’t a knife and fork situation; it’s a hand held—just as a breakfast sandwich should be.

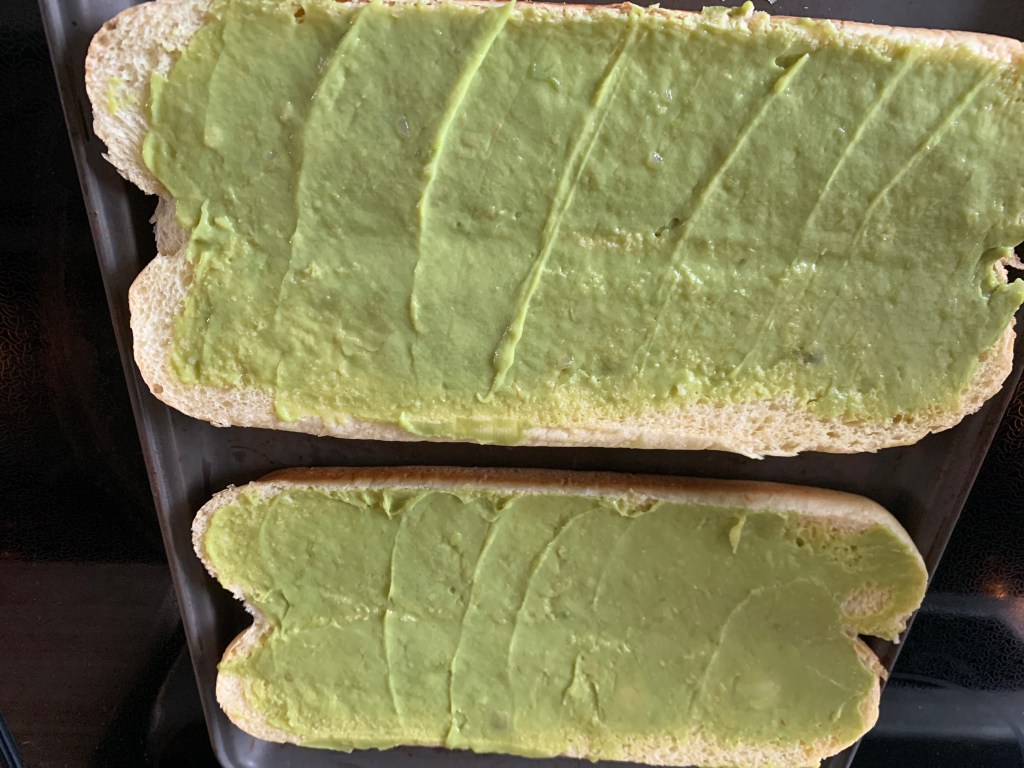
Variations on a theme: If you want a runny yolk, bake it for about 8 minutes. Don’t want ham? A few slices of avocado or tomato would be great here. Any type of hard melting cheese works, even government cheddar.

— Trish Hennessy

Top 10 sandwiches of 2020

I started 2020 with what seemed like a simple idea: make 52 sandwiches—one a week—blog about it, then pick my favourites at year end. What a challenge and mostly pleasant experience this has been. So much so that it’s really hard to narrow my favourite sandwiches down to my top 10. But in my mythical pop up sandwich shop, these are probably the 10 sandwiches that would go on the menu.

The Coney Island Dog

I know, I know. A hot dog makes my top 10 list? I spent a lot of time researching sandwiches for this blog, but I put in more thought and work into the Coney Island Dog than any other sandwich in A Year of Sandwiches, if only because the Coney Island sauce recipes that I came across online were kind of gross. I took inspiration from the Greek origins of the Coney Island Dog and made my own sauce—one good enough to top a hot dog or to go into a moussaka.

Pan Con Tomate

I love this Spanish-style sandwich for its utter simplicity: rustic bread, rubbed with garlic, brushed with olive oil, toasted, then rubbed with a half of a fresh, peak summertime tomato. Season with Maldon salt and a drizzle of olive oil. Perfection.

Muenster cheese breakfast sandwich

I adore breakfast sandwiches, but this one’s special. It’s a combination of caramelized onions, silky soft scrambled eggs, and melted muenster cheese on a brioche bun. What made this sandwich extra special is that I managed to recreate it based on my pre-pandemic trip to Egg Bae in Kensington Market (Toronto). It was so good I immediately went shopping for the ingredients and made it the very next day. It’s restaurant worthy.

Teriyaki chicken burger

I would have never thought that a chicken burger would make my top 10 list, but this was a challenge for me to make: I hate dealing with raw chicken, I hate BBQing, yet I overcame those obstacles to make the most delicious chicken burger that I’ve ever had. That sauce? Chef’s kiss.

Mushroom wrap

I made a jar of toum (pillowy garlic sauce) and homemade flatbreads for this delectable vegetarian sandwich. And I’d do it all over again, it’s that good.

Shrimp toast

Making a shrimp paste to spread on rustic toast and broil, coupled with an Asian-inspired dipping sauce makes this a delicious appetizer for cocktail/mocktail hour.

Black bean melt

I’m not a huge fan of black beans but pop this Mexican-inspired black bean paste and cheese number into a hot oven then top with a refreshing pico de gallo and this is a study in contrasts. It was so good I made it all over again the very next day.

Patty melt

This might be my favourite sandwich photo of the year. There’s something about a stack of patty melts that is enticing. And I adore a good patty melt. It’s far better than the overrated hamburger (fight me!).

Pesto cabrese loaf

This is how you feed a crowd in summertime, taking all of the flavours of a caprese salad—peak summertime tomatoes, buffala mozzarella, and homemade pizza—and stuffing that into a sourdough loaf, pressed under a cast iron pan in the fridge to let those flavours meld. Best sliced into wedges and served cold, but pop that thing in the oven for melty goodness and no one will complain.

Crab cake sliders

These crab cake sliders are crunchy, the red cabbage slaw is tart, and the homemade tartar sauce is tangy. It’s a party on a platter.

Honourable mentions

Yeah, I know I’m cheating, but here are a few more sandwiches that deserve top 10 status.

Lobster rolls

Craig & his mom helped me make these for her 70th birthday brunch, pre-pandemic. It was decadent.

French dip

I made the roast beef and dip from scratch—spending more time researching french dip recipes that I should admit, then making my own version. Better than what they serve in restaurants IMO.

Hot chicken sandwich

Someone on Facebook called this old-fashioned hot chicken sandwich a “heart attack on a plate”. Yeah, maybe, but it was a special treat. And, yes, I made that gravy from scratch.

Philly cheesesteak

The Philly cheesesteak is iconic for a reason.

Thanksgiving sandwich

The secret ingredient is Craig’s idea of a “stuffing burger”. Game changer.

Tartines

They’re pretty and I totally invented these sandwiches.

— Trish Hennessy

Retro celery toast

When you spend a year researching and creating sandwiches, you come to appreciate how the sandwich can elevate even the humblest of ingredients.

Take this retro celery toast, for instance. I never would have thought that celery belongs in a sandwich—let alone as the star—but after reading this beautiful essay by Gabrielle Hamilton, I had to give it a try, based on her recipe.

It features shaved celery, minced garlic, toast, butter, and blue cheese. It’s a study in simplicity, but it also takes time and care to shave the celery on the diagonal. It’s precision work, and shaving—not chunking—the celery is key to this dish. Slow down and enjoy the experience of pulling together a sandwich for your loved one.

The celery and minced garlic (Gabrielle’s recipe calls for thin slices of one large clove of garlic; I minced mine) gets marinated in a dressing of lemon, olive oil, salt and pepper.

Toast the bread—I was lucky enough to have pullman bread on hand, which is what Gabrielle recommends, but any kind of toastable bread will do. Butter it with unsalted butter.

Add blue cheese. Gabrielle’s recipe calls for slices of blue cheese; I spread it on the buttered toast instead. Be generous. (If you don’t like blue cheese, I’m sure brie will do; it will just be a less bold).

Celery salad goes down.

Now I add my own twist: I’ve chopped up some walnuts and fresh rosemary.

That gets toasted in a pan for a couple of minutes.

Then top the celery toasts with a smattering of rosemary walnut crumble. Slice each toast into quarters—squared or triangled.

This toast is simple yet elegant, and I think it merits breaking out the good dishes. A china plate, your best glassware.

I’m making cosmopolitans and serving this at cocktail hour. It feels old school; like you should just sit back and read the evening newspaper as the sun sets. It’s the perfect way to end A Year in Sandwiches. In January I set out to make 52 sandwiches and blog about my journey. I’ve made diner classics, vegetarian keepers, wraps, subs, burgers, tuna melts, breakfast sandwiches, and more.

Celery toasts remind me that there is still much more to be discovered in the sandwich world—the sandwich is just that versatile.

And these little numbers are simply swellegant.

— Trish Hennessy

Tartines

There used to be a sunny lunch spot at Toronto’s Holt Renfrew store that served a full tartine menu for lunch. The rustic tartine bread was flown in from Paris, thinly sliced, toasted, and served as a canvas for a beautiful array of sandwich options: cold Nordic shrimp and dill tartines, roasted mushroom tartines, you name it.

My tartines feature Blackbird Bakery rustic sourdough bread and I’m cleaning out the fridge to make tartine two ways: (1) a blue cheese, acorn squash, swiss cheese, apple, and crispy sage tartine, and (2) a blue cheese, bacon, and lemon-dressed arugula tartine.

Let’s start with the squash tartine. I had split and roasted an acorn squash earlier in the week and stored it in chunks in my fridge. Normally that would go into a squash soup or maybe a casserole, but I wondered if I could find a way to incorporate squash into a sandwich, so I thought I’d give it a try.

I take the squash out of the fridge and put it into my food processor along with salt, pepper, and 2 cloves of roasted garlic, which was also sitting in the fridge waiting to come in handy. Now you could go the more traditional route, flavouring the squash with nutmeg, cinnamon, maybe even a hint of brown sugar but I’m looking to tone down the natural sweetness of the squash. So I’m using bossy ingredients, like roasted garlic in the puree and blue cheese in the tartine.

I started pureeing the mixture, slowly drizzling olive oil to loosen up the puree (I used about 3 tbsp of olive oil here).

The squash is perfectly pureed and gets spooned into a bowl that will go into the fridge for when I’m ready to make my tartines. The leftovers will get incorporated into mashed potatoes later this week.

I’ve got a lovely hunk of Gorgonzola cheese in the fridge that needs to get used up, so that’s going to be the base for both tartines. In the squash tartine, it’ll blend with the other ingredients. In the bacon tartine, it battles crispy bacon for stardom.

To my my blue cheese spread, I put equal amounts of Gorgonzola and cream cheese (about 1/3 cup each) into my food processor, add the juice of half a lemon, and blitz it until the cheeses are blended and I’ve got a spread consistency.

In a jar that goes. It’ll sit in the fridge until I’m ready to make my tartines and leftovers will be spread on crackers or celery sticks. It’s a lovely thing to have on hand.

I’ve got leftover bacon from yesterday’s brunch, so that will get used for my bacon tartine. You could also crumble some into the squash puree but I’m wanting a vegetarian tartine.

I’ve also got arugula that needs to get used, so I dress it in a simple lemon and olive oil vinaigrette and set it aside. That tart, peppery salad will bring a cool contrast to the richness of my blue cheese and bacon tartine.

From the fridge, I pull out slices of swiss cheese and some sage leaves—both vital ingredients for my squash tartine.

Here’s my tartine mise en place.

One last prep for my tartines: On medium-high heat I fry up the sage leaves in about 1/4 inch of olive oil until they’re crispy. They go onto paper towel to absorb the oil and get salted with fleur de sel. Crispy sage is really delicious.

Time to build my tartines. Bread goes in the toaster until it’s golden brown and firm enough to host the ingredients.

Blue cheese spread goes down on both toasts.

Squash puree goes down on one toast, bacon on the other. Top the squash puree with two slices of swiss cheese. That’s ready to go onto a baking sheet lined with parchment paper and under the broiler until the swiss cheese melts and the bacon crisps up (3-5 minutes depending on your broiler—keep close watch).

Out of the broiler they come.

Now to add our toppers. I mound the lemony arugula on top of the bacon tartine. Thinly sliced apple gets fanned out on top of the squash tartine and that gets crowned with some crispy sage leaves—bringing crunch and cool contrast to the squash cheese combo.

Pretty.

The bacon tartine is a study in contrasts. I’m actually not a fan of eating an arugula salad on its own, but it sings when paired with the bacon and blue cheese.

The squash tartine becomes transformed into a balance of blue cheese, roasted garlic, swiss cheese to hold it all together and add nuttiness, and the freshness of sliced apple and crispy sage sends this tartine to perfection. It may not be a Holt Renfrew restaurant, but this dish feels restaurant worthy.

— Trish Hennessy

Toasted veg guacamole sub

Back in pre-COVID times, I had a guilty pleasure: whenever work commitments took me downtown near lunchtime, if I walked past a Quiznos I would duck in for their vegetable guacamole sub.

It’s not like most submarine sandwiches. Firstly, the sauce base is guacamole, not tomato. Secondly, most of the sandwich gets broiled under a piping hot toaster oven. Thirdly, then it’s topped with cool, crisp shredded lettuce that’s dressed in a tart red wine vinaigrette.

I can’t remember the last time I passed by a Quiznos, so I’m making a copycat Quiznos vegetable guacamole sub, with my own tweaks.

I couldn’t find a sub roll that’s like Quiznos’, so I worked with what was available: brioche sub rolls. I like them because they’re smaller than traditional sub rolls, so it makes a serving that isn’t going to make you want to immediately take a nap after eating. But it’s still a substantial meal.

The guacamole is a major supporting actor in this sandwich, so you want to be generous with it. Normally I make my guacamole from scratch, but I guess because of COVID-19 supply chain issues, I’ve had a hard time finding good avocados. You know what? Yucatan guacamole is perfectly serviceable in this situation. It gets spread “wall to wall” on both cut sides of the sub roll.

Next, layer on sliced mushrooms and diced red onion.

The Quiznos version adds black olives and tomato slices. I don’t have tomatoes on hand so I’m substituting roasted yellow and red pepper slices and I’m using kalamata olives in this version.

Already I’m thinking this sandwich looks good to go. But wait, there’s more! Quiznos layers on two types of sliced cheese: cheddar and mozzarella. In my case, I’m shredding the cheeses, using a blend of sharp white cheddar and muenster cheese. Be generous with it.

Under a 400 F oven that goes for 10 minutes, then blast it under the broiler. (Or do something similar in your toaster oven, if you have one).

Well that looks delicious. Now all I have to do is top it with iceberg lettuce that’s been shredded and tossed in a homemade red wine vinaigrette: 1/3 red wine vinegar, 1 tsp dijon mustard, 2/3 olive oil, salt and pepper to taste. Or you could use a purchased vinaigrette. I just happen to usually have some kind of homemade salad dressing in my fridge to make the idea of eating a salad more enticing.

Time to close the sandwich and enjoy! It’s not 100% Quiznos, but as a copycat version that’s quick and easy to make from home, it’s pretty damn close. The toastiness of the sub contrasted with the cool iceberg lettuce never lets me down.

— Trish Hennessy

Pizza bread

What’s the fastest way to get pizza on the table? Make your own pizza bread. It’s a hugely versatile concept. You can make an individual “pizza” on a single slice of bread, top it with sauce, toppings, cheese and blast that in a hot toaster oven.

Or you could do what I love to do: Slice a ciabatta loaf in half and give it the pizza treatment.

For the tomato sauce, you could simply use jarred sauce, you could puree some canned tomatoes (san marzano if you’ve got ’em), or, if you’re like me, you probably have a stash of homemade tomato sauce in the fridge. I tend to roast plum tomatoes, cut in halve and drizzled with olive oil, in the oven on Sundays to incorporate into dishes throughout the week. My homemade tomato sauce—punctuated by roasted garlic bulbs—gets spread on the ciabatta loaf. Not too much sauce or your bread will get soggy.

On any pizza night, I usually make one with veggies, one with meat. Start with thinly shaved red onion on both sides.

On the veggie only side, I pile on slices of roasted red and yellow pepper, along with some sliced kalamata olives and a few cloves of roasted garlic—which I also usually have in the fridge for moments like this.

Time to lay down the cheese. You can use shredded mozzarella or, if you find yourself short on that ingredient, blend 2-3 shredded cheeses. Here I’m mixing half and half smoked mozzarella and muenster cheese.

On the meat pizza bread, I’m adding a row of pepperoni on top of the cheese so it gets a little crispy.

Into a 350 F oven that goes for about 20 minutes—you’re looking for a bit of golden brown in that cheese. They’re ready and looking delicious.

Slice the pizza bread into squares and dig in!

— Trish Hennessy

Mediterranean bean burger

When I have a veggie burger, I don’t want it to look and feel like meat—I want to celebrate the plant that it’s based upon. The bean burger does this perfectly, and while black beans tend to be the go-to ingredient of choice for most bean burgers, I’m going with a white bean burger that showcases the flavours of the mediterranean.

I’m basing my bean burger on this New York Times recipe, only I halved the recipe. I also made my beans from scratch, which I frequently do because it’s cheap, it’s a comforting activity, and the beans just taste better. I start with two cups of dried navy beans, poured into a large pot. Add twice the amount of cold water as there are beans. Add your aromatics, which will flavour the beans (I’m using a sprig of rosemary, a clove of garlic, two bay leaves). No salt! Salt comes at the very end. Cover this with a lid and let those beans soak overnight.

In the morning, put the bean pot on a medium-high burner and let those beans cook for about 2 hours, skimming the foam from the top to encourage a clear broth, and stirring occasionally. You’ll know the beans are ready when you can easily smash one with a spoon and the inside is nice and creamy.

Once those beans are cooled down, I pour them into mason jars and let them sit in the fridge for up to a week, to incorporate in soups, stews, dips, you name it. They’re a golden gift in your fridge awaiting your imagination.

Beans aren’t the only thing going into my burger: I’m adding 1 diced onion, 2 minced garlic cloves, about 1/2 cup shredded carrot, and the juice of half a lemon. The onions go into an oiled pan to sautee until tender, then add the carrots and garlic cloves for 1-2 minutes more, until the carrots are tender and the garlic has released its perfume.

Cut the crusts off of two pieces of stale bread, break the bread slices into chunks and give them a whirl in the food processor to make fresh breadcrumbs. Save the bread crusts to make homemade croutons—great for soups and salads.

Remove the bread crumbs from the food processor. Into the food processor go:

1-1/2 cups of cooked beans (no liquid), the lemon juice, salt and pepper to taste and blitz that until you’ve got a rustic bean puree.

Into a large mixing bowl, dump the bean puree, the breadcrumbs, sage, 1/4 cup minced fresh parsley, onion and carrot mixture, as well as half of a beaten egg. Now get in there a mix with your hands.

Once the mixture is fully incorporated, form four patties, placing them on a sheet pan lined with parchment paper.

These are ready to go into to the fridge, tightly covered with plastic wrap, for 2 hours or even up to 24 hours. You want them good and cold before they hit the hot frying pan.

Meanwhile, let’s build some mediterranean flavours into this bean burger. The 1990s are calling and they’re asking when we get to have tomato pesto again. Well, today is that day, inspired by David Lebovitz’s version. Here’s my mise en place.

Back to the trusty food processor: blitz 1 cup of sundried tomatoes that have been packed in oil (reserve the oil), 1/4 cup of toasted walnuts, 1 tsp minced rosemary.

Add to the tomato paste: 1/2 cup of the sundried tomato oil (top it up with olive oil if you don’t have enough), 1/4 cup freshly grated parmesan, 1 tsp finely minced fresh rosemary, fresh cracked pepper. Let the food processor do its magic until you have a nice paste.

That goes into a little jar that can be kept in the fridge and used with pasta or on crostini. Another flavour gift. We’ll use a generous schmear of this for our burger.

I’m topping my bean burger with sauteed shitake mushrooms that have been seasoned with salt and pepper. Simple.

Once the mushrooms are cooked, I’m ready to fry my bean burger and get this party started. I butter Martin’s potato buns. They’ll go butter side down into a medium fry pan just before plating.

Next, I take my bean burgers out of the fridge. They’ll go into a cast iron frying pan that’s glistening with olive oil on medium-high heat and cook, about 3-4 minutes per side. (Pro tip: use two spatulas to encourage a good burger flip without things falling apart).

That patty’s looking golden brown, so I get my buns down until they’re nice and golden.

Time to build my bean burger. Tomato pesto goes down on the bottom half of the bun.

Burger goes down, topped with the shitake mushrooms.

I top that with a few sprigs of sunflower sprouts that have been brightened with a lemon/olive oil dressing. And I smear a little bit of mayo on the top bun.

It’s a delicious burger, but it’s missing something. Craig to the rescue. He pulls out some aged cheddar and melts it on his version. It does the trick, but you could also opt for crumbled feta and chopped kalamata olives. I’ve also swapped the mayo for cream cheese or goat cheese and it’s equally good.

It’s a lovely veggie burger and a great excuse to do something with those sundried tomatoes that are sitting in your fridge!

— Trish Hennessy, with Craig Pickthorne’s finishing touch.

Philly cheesesteak

I have a confession to make: I am so enamoured with the concept of a Philly cheesesteak sandwich, I dream about spending a long weekend in Philadelphia hopping from one sandwich joint to another sampling the city’s famous sandwich.

It’s not unheard of—this guy ate 16 Philly cheesesteaks throughout Philadelphia in 12 hours. OK, so I will never do that. Instead, I’ll invite Craig into the kitchen to make us a Philly cheesesteak that is so good, we don’t need to go to Philly.

Now the Philly cheesesteak is pretty straightforward, but every ingredient matters.

The steak has to be thinly sliced (against the grain) rib eye. All other steak cuts will become grizzly as you grill it. One sliced rib eye should get you enough to fill two sandwiches.

The bun tends to be a hoagie roll, but we’re living in COVID-19 times, and hoagie rolls are hard to find in these parts. So we’re making due with a long Italian roll that’s not too crunchy on the outside and is soft on the inside. Pull out the insides of the bun to hollow it out and make more room for the filling.

There are two cheese options for the Philly cheesesteak: provolone or Cheez Whiz. We’re going wit’ whiz. Scoop about a cup of Cheez Whiz into a saucepan and gently heat it on medium low until it’s loose enough to drizzle on the sandwich.

Dice two white onions and set aside (in this case we had one white onion one red onion in the pantry, so we used them both).

Time to break out the cast iron frying pan. Glisten it with a neutral vegetable oil and bring the temperature up to a high heat—that will help to quickly sear the meat. Now comes the tricky part, and this is why Craig is making this sandwich and not me—he’s a superior stovetop line chef, especially when it comes to meat.

Craig’s using two tools to chop up the steak while it’s sizzling in the pan: a metal scraper that he usually uses for dough and a metal spatula. Picture Edward Scissorhands chopping away at the steak and tossing it around to get it nicely seared: that’s Craig at work on this sandwich.

Once the steak is cooked, Craig moves the cast iron pan partly off of the burner and tucks the steak in that corner, then he tosses the onions into the hot side of the pan for a quick sear.

Once the onions are ready, Craig incorporates them into the steak, slides the whole cast iron pan onto the burner, and places the bun on top of that pile to quickly steam it (less than a minute). If you decide to use provolone instead of Cheez Whiz, place the cheese slices over the meat mixture, let that cheese melt, then steam the bun.

Using a spatula, scrape up the meat mixture and fill the inside of the bun. Then drizzle on some whiz.

It’s a really great sandwich. One of my all-time favourites.

— Trish Hennessy, with Craig Pickthorne’s cooktop superpowers.

Brie and pear grilled cheese

Grilled cheese sandwiches will never get old for me. There are so many possible variations to get that gooey goodness on a plate, but I rarely experiment. I usually stick to a good cheddar and go to it. Today, I’m spreading my wings and reaching for brie, pears, a mess of caramelized onions, and Martin’s potato bread. Here’s my mise en place.

Making this sandwich is super easy. It just requires patience to slice and caramelize the onions. I like to make a big batch of caramelized onions for use in other dishes throughout the week. It’s a great flavour booster.

Two sliced onions and a healthy dose of olive oil go into the pan on medium-high heat. Season with salt and pepper. Stir occasionally to ensure all of the onions cook down.

Once the onions are soft, add about 4 tbsp of balsamic vinegar (pro tip: keeping your head back so you don’t inhale those strong fumes once the vinegar hits the pan.) Keep stirring, adding a splash or two of water to keep the onion/vinegar mixture from burning. This process takes about 20 minutes—or more if you like a jammy quality to your caramelized onions.

Meanwhile, slice two pears (apples will do fine here too), get a pan glistened with olive oil going on medium heat to do a light sautee on the pears (about 5 minutes). I seasoned the pears with a hint of freshly grated nutmeg and fresh cracked black pepper. You have the option of serving the pears as is, but my pears aren’t the ripest so the sautee method makes them readier for prime time.

Time to build the sandwich. Butter two slices of bread, wall to wall. Lay down thinly sliced brie cheese on the unbuttered side of one slice of bread.

Layer the pear slices on top of the brie. On one of my sandwiches I’m adding some crumbled blue cheese as an experiment. I want to see how it changes the flavour profile of this sandwich.

Caramelized onions go down (be generous!).

Cover the sandwich with the other piece of bread, butter side up and get that sandwich into a hot pan at medium heat, grilling on both sides until the bread is golden brown and the brie has melted.

Once the sandwich is grilled, we’re ready to serve.

The brie is dreamy and plays well with the pears and caramelized onions. The version with blue cheese was my favourite—it added complexity and it cut through the natural sweetness of the pears and caramelized onions. I haven’t worked with Martin’s potato bread before—it’s sweet and rich like brioche, which isn’t my favourite way to go with this sandwich. Next time I’ll opt for a pullman loaf if I can find one.

Overall, this is a decadent, rich grilled cheese. I’ll definitely make it again, but would more likely serve it cut into four triangles—more like an appetizer bite than a lunch sandwich.

— Trish Hennessy

Spinach artichoke melts

When it comes to vegetables, spinach is my first love. When it comes to a delicious hot dip, nothing beats spinach/artichoke dip. Let’s turn that into a sandwich.

My hot spinach/artichoke melt puts the vegetables forward—1 can artichokes, drained, 1 package spinach—with minimal “dip” ingredients: only 2 tbsp mayonnaise, 2 tbsp cream cheese, a dash of cream, 1/2 cup shredded parmesan, the juice of half a lemon, 1 large clove of garlic (minced), and salt & pepper to taste.

My melts are inspired by this Bon Appetit recipe, with tweaks because I can somehow never follow a recipe.

In most recipes, including the Bon Appetit recipe, it calls for boiling the spinach then squeezing the moisture out. I humbly disagree with this treatment. Better to sautee the spinach in a large fry pan on medium-high heat with a drizzle of olive oil and 1 large clove of garlic, minced. That garlic will infuse the spinach and there will be very little moisture to worry about.

Once the spinach is cooked down (wilted but some life left in it), transfer to a cutting board and coarsely chop. Do the same with the can of drained artichokes (squeeze those artichokes to get the moisture out).

Get that into a large bowl and add: 1/2 cup freshly grated parmesan, 2 tbsp mayo, 2 tbsp cream cheese, the juice of 1/2 a lemon, salt & pepper to taste. Mix with a spoon to incorporate all of the ingredients.

This can be made ahead and stored in the fridge until you’re ready to make your melts. I’m ready! You want a sturdy bread for your base—I’m using Blackbird Bakery seeded sourdough bread. Hardy and delicious. At this point you can toast the bread and then drizzle it with olive oil, broil the bread on both sides, or toast the bread in a fry pan with olive oil. I prefer this latter method because you can control the heat and hydrate the bread.

That bread is looking nice and toasty. I love how rustic it is. Ready for the toppings.

Heat the oven to 400 F. Take a baking sheet, line it with parchment paper, lay down the toast then top it with the spinach/artichoke mixture. Cover every inch.

Add cheese. In this case I’m using an equal mixture of cubed gouda and babybel cheese—you could use any mixture of melty cheese but I like the nutty texture of the gouda and the babyel as creaminess. They’re both great melting cheeses.

Top with a crack of pepper and into the oven that goes for about 20 minutes or until the cheese is melty. Broil that for about a minute to get a golden cheese crust—the best!

The bottoms of the bread are a delicious golden brown.

This makes for a great vegetarian brunch feature or you could slice it into smaller pieces for an excellent appetizer.

— Trish Hennessy

Pepperoni pizza pocket

Every once in a while the child within screams out: I want a pizza pocket! And so I oblige.

I’ve managed to find a good quality mild pepperoni—something I rarely eat—and I want to make it the star of my pizza pocket, nestled in between homemade marinara sauce and melted mozzarella.

You can use purchased pizza dough for this pocket, but if you’re lucky to live with a pizzaiolo (pizza maker) as I am, you’ll have him make the dough for you. Craig is using the following ingredients for his dough:

Hydration %61
grams
00 Flour130
Water100
Semolina Rimacinata (twice ground and finer than regular)36
Sea salt5
Instant yeast5
Olive oil14
Honey5
Yeah, he takes his pizza dough seriously …

Here’s his mise en place for the dough. He weighs everything.

Into the Cuisinart mixer it goes, mixing for about eight minutes (it should start climbing up the dough hook when it’s ready).

Looks a bit shaggy, ready for resting. Craig takes the dough and places it on a floured countertop. He uses the mixing bowl to cover it and lets it rest for 20 minutes.

Craig folds the dough inward in repeated motions until it looks smooth and supple like this.

That goes into the mixing bowl which goes into a 30-degree F oven, covered with a damp tea towel or a silicone lid for about an hour—or until it doubles in size. Next, he forms the dough into two balls and that goes through a cold proof, covered in the fridge, for 48 hours. Craig says that’s what gives the dough its springiness and tanginess.

Take the dough out, bring it to room temperature. Divide the dough into smaller dough balls (weighing in at 150 grams). Generously sprinkle a ball of dough with all-purpose flour and plop that onto a plate of refined semolina flour. Push down on it to flatten the dough. Turn the dough over and do the same.

Transfer the thick disk onto a floured countertop and stretch it into a round (about 9 inches in diameter).

Ready for the filling, which consists of only three ingredients: marinara sauce (I made it from scratch by simmering a can of san marzano tomatoes, 1 tbsp tomato paste, salt, pepper, dried oregano to taste.

That simmers on medium-high heat for about 20 minutes, then it gets pureed into a sauce.

Along with my tomato sauce, the filling consists of pepperoni and torn mozzarella but you can customize this to your liking. Ricotta and spinach? No problem.

Tomato sauce goes down on one half of the dough, leaving room around the edges so the sauce doesn’t drizzle out when baking.

Pepperoni goes down.

Mozzarella goes down.

Fold the dough over to create the pizza pocket.

Crimp the edges of the dough to seal everything in.

Important: Poke 2-3 holes, using a knife, into the top of the pizza pocket to allow heat to escape. Some of the filling will bubble over onto the top of the pizza pocket and that will make it even more delicious.

I sprinkle some semolina flour onto a pizza peel, slide my pizza pocket onto the peel, and deposit it onto a hot pizza stone that’s been heating in a 375 F oven for 30 minutes.

If you don’t have a pizza stone, no problem. Just heat a baking sheet and, at the last minute, drizzle some olive oil and sprinkle some semolina onto the sheet before placing the pizza pocket on top of the hot sheet.

That bakes for about 20 minutes—until the pizza pocket is golden brown.

That gets placed onto a cooking rack to cool down a bit. I plate my pizza pocket with a bowl of the homemade marinara sauce topped with grated parmesan cheese—perfect for dipping.

—Trish Hennessy, with Craig Pickthorne.

Design a site like this with WordPress.com
Get started